Wednesday 21 October 2015

Joules Design A Welly Competition


If you've ever wanted to design your very own wellington boots then Joules have got a great competition for you. As one of Britain's best loved lifestyle brands, Joules are well known for their outdoor wear with clothing collections for men, women & children. The opportunity to design a pair of Joules wellies is not one to be missed. The winner of the competition will see their design put into production & will also win a luxury forest holiday worth £5000! All proceeds from the sale of the limited edition winning welly will go towards CHARITABLY JOULES.

To enter the competition just go to http://getcreative.joules.com & submit your design. The design process is very simple so it's well worth entering even if your digital drawing skills aren't quite up to scratch. It would be so amazing to see your welly design on sale at joules.com & a £5000 holiday certainly wouldn't be too shabby either! Ten runners up will receive a £250 Joules gift card. The competition closes on 4th December 2015. Good luck!


twitter / tumblr / youtube / instagram / bloglovin'

Thursday 15 October 2015

Irresistible Me Hair Extensions


I've mentioned several times now that the top layer of my hair broke off last year & it's taken this long to grow it out to chin length. My hair looked like a complete mess & it was really getting me down. I started looking into wigs & hair extensions as a way of enhancing my hair. I wanted something that could blend in the top layers with the rest of my hair & thicken up the straggly ends. Just as I was doing this 
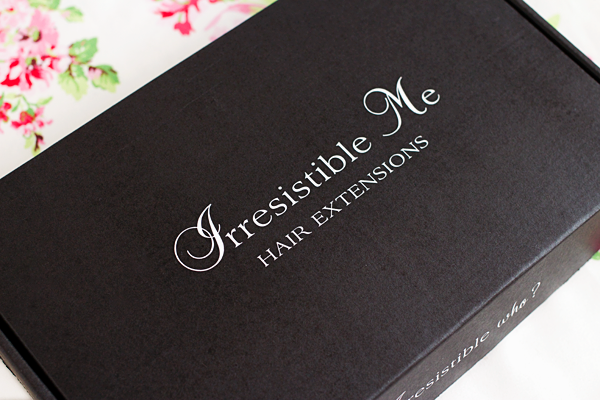
Irresistible Me got in touch & offered me the chance to try out some of their hair extensions. Their timing could not have been any better! After looking through their different ranges I ordered the Royal Remy Clip-In Extensions in Royal Platinum Blonde. Royal Remy is their premium line of clip-in hair extensions. They use 100% human Indian Remy hair that has been specially treated to add extra silkiness & durability. These extensions are very easy to blend with your own hair and can be styled, cut, coloured & curled for an ultra glamourous look. Compared to their other extensions, the Royal Remy hair will last longer & look more voluminous. They are the closest match you can find to completely unprocessed hair.

As I was looking to add extra thickness to my hair rather than tons of length I decided to go for the 14" hair extensions. I've struggled to find anything shorter than 18" in the past so I was really excited to see that Irresistible Me offer such a wide range of lengths (14"-24"). I was unsure which weight to go for but they advised me that 140g would be best for adding volume with the 14" extensions. In the 140g set you get 8 pieces: one with 4 clips, three with 3 clips, two with 2 clips & two with 1 clip.

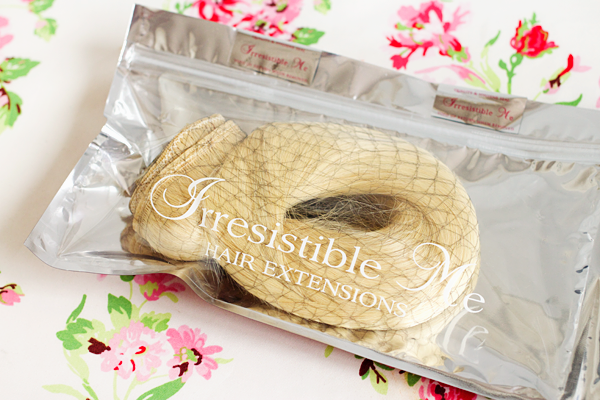
Irresistible Me are based in New York but delivery to the UK was lightning fast via FedEx with no customs fees. The hair comes packaged in a foil bag with one of the pieces separate from the rest. This allows you to get a better look at the shade & length without opening the full set. If you decide that they aren't right for you, simply leave the protective seals intact and you can return them for an exchange or a full refund. When I opened up the package I knew that they wouldn't be the right colour for me but that could soon be corrected. The quality was impeccable. They felt really soft & thick so I couldn't wait to put them in my hair!


Royal Platinum Blonde is the lightest shade that Irresistible Me do but it was far too dark & warm for my hair. I didn't want to ruin the beautiful quality of the extensions with bleach so there was no way that I could get them to match my previous shade of blonde. I tried toning them with purple shampoo but they still didn't match my own hair whatsoever. I decided that this was a great opportunity to go back to grey hair instead. I used 
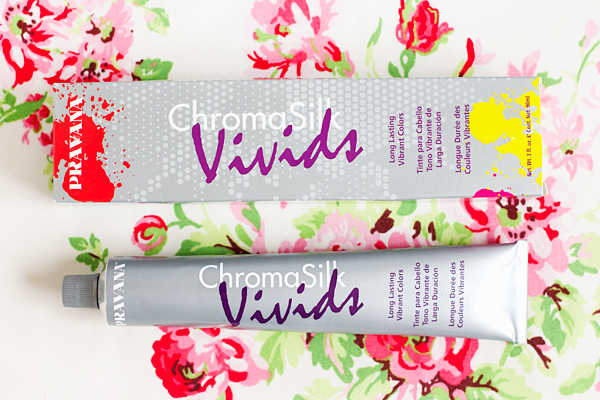
Pravana ChromaSilk Vivids in Silver diluted with white conditioner to dye both my hair & the extensions. I'd never used this particular dye before & I'd never tried to colour hair extensions before so this was a very new process to me. I watched one of Irresistible Me's YouTube videos on how to dye hair extensions & this made things a lot clearer.

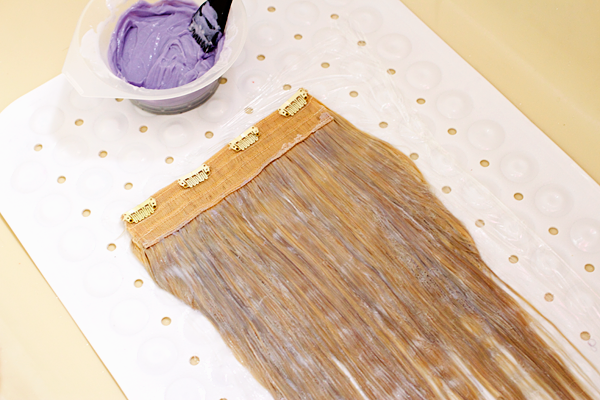
I placed long pieces of cling film in my bathtub & used a tint brush to cover both sides of the extensions with the silver dye. Then I could wrap up each weft & leave them to process with minimal mess. The first time I dyed them I left them for 2 hours so they could really soak up the colour. They looked a bit patchy afterwards so I dried them off & dyed them again when I did my own hair. This time I left them for about an hour & the second dye application made the colour look a lot more even. I actually ran out of dye so I need to buy another tube to redo the quad weft as there are still some yellowy strands in it! Overall I'm very happy with the colour now & they match my hair perfectly. My one complaint about Irresistible Me & hair extension brands in general is that not many of them do a light enough blonde shade. It would be so much easier to match my usual blonde hair or to dye the extensions pastel colours if they would just make some lighter wefts.


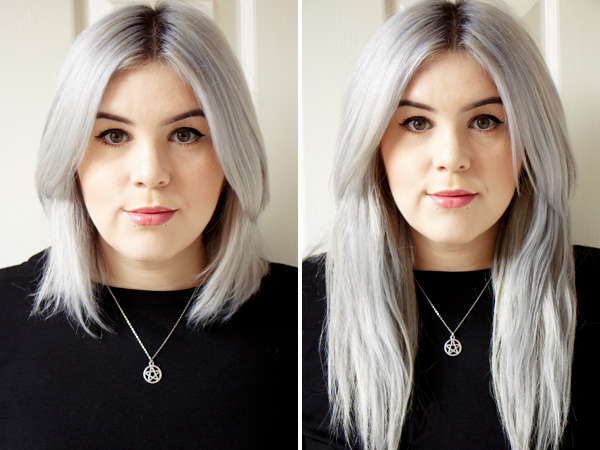
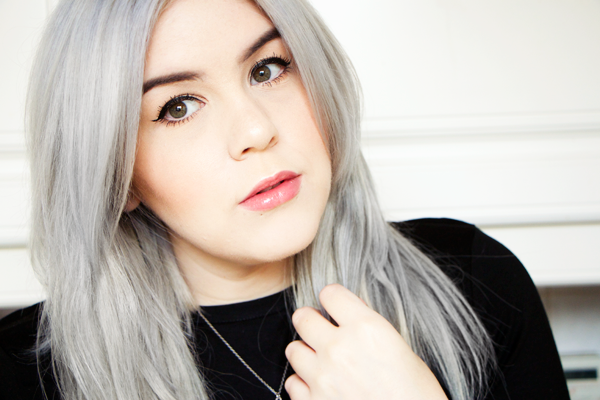
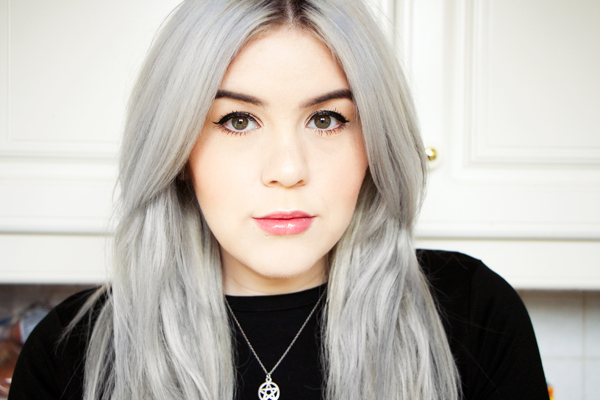
So here is how my hair looks before & after putting in the Irresistible Me extensions. They look absolutely incredible, I love them so much! The quality is phenomenal & they still feel silky soft even after I dyed them. The hair is so thick & luxurious from top to bottom which provides plenty of body. The only styling I did was to lightly straighten them as I wanted them to be textured without looking too perfect. The 14" wefts look a lot longer than I was expecting but for me the length is perfect. This is how long I wish my real hair could be. I don't know how anyone can manage with 24" hair extensions as I definitely feel very mermaid-like just with this length. They blend in with my hair really well & if you didn't know me I don't think you would necessarily clock them as extensions.

I've worn clip-in extensions in the past but they have never managed to make my hair look so full & bouncy before. These are easily the best hair extensions I've ever tried. The clips are extremely secure & I haven't noticed any shedding at all. They feel very comfortable on my scalp which is vital when choosing extensions so you can wear them for extended periods of time. As they're clipped to the healthier layers of my hair they don't put any stress on the broken top layer so they're a great way of playing about with my hair without causing further damage. I just love everything about them & I'm so thankful for Irresistible Me's utterly brilliant hair extensions!


twitter / tumblr / youtube / instagram / bloglovin'

Thursday 8 October 2015

Kiss Cosmetics Double Ended Lip Brush


Kiss Cosmetics Double Ended Lip Brush* - £5.50

At this time of year I love wearing bold lipsticks but they tend to be a little harder to apply than my usual pinks & nudes. Good application is key to pulling off really bright or dark lip colours. Something like black lipstick can make a real statement but if your edges are wobbly then the only statement it makes is that you suck at applying makeup. Using lipsticks straight from the bullet often doesn't yield the best results & if you want a professional looking finish then a lip brush is definitely the way to go. In the past I've used lip brushes from MAC & Real Techniques which I still think are brilliant. However Kiss Cosmetics have just brought out their revolutionary new Double Ended Lip Brush & in my opinion it is the ultimate tool for precision lipstick application.


Having never seen or heard of a double ended lip brush before I did wonder whether it was really necessary. One brush is surely all you need to put some lipstick on? But if you struggle to get those super sharp edges then working with both ends of this brush can make all the difference to your makeup skills. The shapes of each end have been specially designed to ease application to the cupid's bow & the edges of your lips. On one end you get the Define brush which is pointed & perfect for lining the lips. You can get really crisp lines with this brush so it's great for lip art too. Lip brushes tend to get a bit messy but this side is retractable in order to keep the brush both hygienic & compact. It can also double up as an eyeliner brush! It's really handy to take out with you & saves space in your makeup bag. On the other end we have the Fill brush which has a unique angled paddle shape to fill in your lips & define your cupid's bow. The brush is wide enough to fill the lips without constantly needing to top it up with more product. It applies colour beautifully & blends your lipstick evenly for a truly perfected pout.


To test out the lip brush Kiss Cosmetics also sent me a Mini Kisstick in Magnetic Melon. This colour is to die for! It's a vibrant orangey-red that would look amazing on all skin tones. It also makes my teeth look a bit whiter which is always nice! The formula is both highly pigmented & moisture rich so it feels really comfortable to wear. This has to be one of the longest lasting lipsticks I've tried. Obviously it's not as hard-wearing as a liquid lipstick but for a traditional lippie it really stays put & leaves a bit of a stain so the colour fades evenly. I used the Define brush to line my lips with Magnetic Melon. When I normally apply lipstick I like to use a lip liner first but if you don't have a shade that matches your lipstick then this brush does exactly the same job. I was able to get some really clean lines with it & it works for overdrawing your lips too. Then I loaded up the Fill brush & applied the colour to the rest of my lips. One of my main concerns with bright lipstick is getting it on my teeth. With the Fill brush I was able to place the colour very precisely & as a result my teeth are totally lipstick-free! The finish is very smooth & even which makes a bold lipstick like this look even more stunning.

Kiss Cosmetics are definitely onto a winner with their ingenious Double Ended Lip Brush. It's a real game changer and works with lipstick, lip gloss, liquid lipstick & eyeliner. I'm obsessed with my Jeffree Star Liquid Lipsticks & this tool has made them so much easier to apply. I love how neat my lips look with the aid of these two brushes & in future I don't think I'll bother trying to apply a bright lipstick straight from the bullet. The Double Ended Lip Brush & Kissticks are both cruelty-free and available from www.kisscosmetics.co.uk.


twitter / tumblr / youtube / instagram / bloglovin'

Monday 5 October 2015

Essence Summer Nail Art Challenge


Summer is officially over but that doesn't stop me from wanting to paint my nails with bright cheery colours. To wrap up the season Essence challenged me to come up with the perfect Summer manicure. They sent me a little goody bag filled with a nail file, three different nail polishes, nail art stickers & some nail art tools to use in my designs. Having never tried any of their nail polishes before I wasn't sure what to expect but the quality is outstanding. I really love the three nail polishes I received. The formula of the green gel nail polish (27 Don't Be Shy) is incredible & it looks super shiny even without a top coat. For a gel polish the price can't be beaten. I'm definitely going to buy a few more of these! I think that the pastel peach polish (03 I'm So Fluffy) looks adorable & it has quick-dry matte finish. I can't resist a bit of glitter on my nails & the glitter effect nail polish (20 Hidden Garden) goes perfectly with the green gel.


After playing about with the colours I decided to do some triangular nail art. This would allow me to incorporate all three nail polishes in my designs & it looks really effective despite being quite a simple pattern to do. First of all I shaped my nails using the Studio Nails Sweet Mini File. It has a slight lemony scent to it which is pretty cool but I much prefer my Only Fingers + Toes Glass Nail File. Next I applied a layer of the Sally Hansen Maximum Growth Base Coat to prep them for colour.

I applied two coats of I'm So Fluffy to all of my nails apart from the ring fingers. I used one coat of Don't Be Shy & one coat of Hidden Garden on my ring fingers as accent nails. To create the triangle shapes I cut pieces of sellotape in half & placed them diagonally across my nails. It's very important to make sure that the nails are completely dry at this point or the sellotape can mess them up. I painted the spaces in between with Don't Be Shy & peeled off the sellotape while the polish was still wet as this allows you to get sharper lines. I then took the striping brush from the Nail Art Designer Set & applied thin lines of the glitter polish along the edges of the triangles. I also wanted to use some of the Neon Nail Art Stickers as the designs are really cute. Stickers like these are such a quick & easy way to jazz up your manicure. It's just a shame that they come in all different colours & sizes as I like symmetry. I popped the orange star on one thumb & the orange peace sign on the other. Finally I used my Mavala Mavadry Top Coat to seal everything together & give the nails a glossy finish.

So what do you think of my nail art? I'm actually really happy with how my Summer manicure turned out! The colours look so pretty together & the glitter accents definitely make the design a bit more special. This was my first experiment with triangular nail art & I really like the effect so I plan on trying out something similar in the near future. All of the Essence products in this post are available to buy at Wilko, both in store & online.


twitter / tumblr / youtube / instagram / bloglovin'

Saturday 3 October 2015

Sunny Delights


Over the Summer I became slightly obsessed with buying new pairs of sunglasses. Normally I'm pretty content with just wearing my trusty old Ray-Ban Wayfarers & Clubmasters. However this year brands kept coming out with so many cool new styles and... let's just say I got a bit carried away!


Quay Australia Kitti Sunglasses in Black / Smoke Lens

One brand in particular fuelled this new found desire for stylish frames & that was Quay Australia. Their sunglasses were all over Instagram & as a result getting hold of a pair was near impossible. I had to order some of mine directly from the Quay website but delivery was pretty fast considering they came all the way from Australia. The initial rush seems to have died down a bit now & it's much easier to find them on ASOS or Topshop. The first pair I bought were the Kitti sunglasses. I love their classic cat eye design which is very flattering & suits many face shapes. They equally remind me of the sunglasses that Audrey Hepburn wore in Breakfast At Tiffany's & a superhero mask. However they have one major flaw. The frames are made from a matte rubbery material, similar to what NARS use on their product packaging. Whenever I wear these I end up with black marks all over my face. The faux-monobrow they give me certainly isn't a good look! I still think they look really cool though so whenever I wear them I just have to make sure I've packed some extra concealer & I'm good to go!


Quay Australia Invader Sunglasses in Black

The second pair I purchased were these black Invader sunglasses. They have a similar cat eye style to the Kitti but with round lenses & cut-out details. I've probably worn these ones the most out of all the sunglasses I've gotten recently. They're sure to turn a few heads & I always get loads of compliments whenever I wear them.


Quay Australia Invader Sunglasses in Gold

As I love the Invader style so much I also bought them in gold! I have so many pairs of black sunnies so I wanted something a bit different. I'm obsessed with gold accessories & the futuristic design of these sunglasses makes them a very bold fashion choice. I think they look utterly incredible & they're such a fun way to liven up a simple outfit.


Quay Australia My Girl Sunglasses in Black / Blue Mirror Lens

The final pair that I bought from Quay Australia were the infamous My Girl sunglasses. They are undoubtedly Quay's most popular style & it was a nightmare trying to get my hands on them. Shops just couldn't keep them in stock! I finally tracked them down on the Topshop website & ordered them immediately. I'm so glad I managed to buy some as those blue mirror lenses are simply mesmerising! They're absolutely huge but the fit is perfect. They feel much sturdier than the other frames & are really well made. Again the shape is universally flattering & they look stunning!


Sundried Bamboo Sunglasses*

Sundried are a new clothing & accessories brand who will be officially launching next year. Inspired & tested by real athletes, their apparel is made using responsibly sourced materials with low environmental impact & respect for people in the supply chain. I'm really excited to be able to show you something from their sunglasses collection! I've been loving wooden accessories lately & their Bamboo sunglasses are no exception. They come in a classic wayfarer style but the frames are made from real bamboo. Not only do they look awesome but they feel super light & are very comfortable to wear. I'm looking forward to seeing what other fashion innovations Sundried have up their sleeves!


Marc By Marc Jacobs 369S Sunglasses in Pink Blush*

Sunglasses Shop kindly sent me these adorable Marc By Marc Jacobs sunglasses. I don't own any other pink sunglasses & I just thought they looked really cute. I love their unique butterfly shape! They're very oversized which makes them a great pair to hide behind when you're feeling a bit worse for wear!

Do you have a favourite pair of sunglasses?


twitter / tumblr / youtube / instagram / bloglovin'

Friday 2 October 2015

September Favourites


Bee Good Raspberry & White Chocolate Lip Balm*
One of Bee Good's latest releases is this delectable lip balm & I can't get enough of it! Raspberry & white chocolate is such a classic flavour combination. The velvety sweetness of white chocolate complements the flavour of fresh fruity raspberries so very well. To me it tastes a bit like artic roll which is one of my favourite desserts! It feels like such an indulgent treat to pop this on my lips. It instantly soothes & hydrates dry chapped lips with a clear glossy finish. The formula includes many natural ingredients along with Bee Good's signature beeswax & honey which are well known for their healing properties. It really is good enough to eat!

Superdrug Simply Pure Hydrating Serum
Superdrug have some amazing own brand skincare products that should not be ignored. You might think that something costing only £2.69 would be a load of rubbish but their Simply Pure Hydrating Serum is one of the best things I have ever put on my face! This silky serum features a wonderful blend of hyaluronic acid, lactic acid, ceramides & Soothex®. Together these ingredients help to nourish, soften, exfoliate & calm the skin. It's very gentle but can make a huge difference to the texture of your skin. Most people suffer from dehydrated skin without realising it so it's important to include something like this in your skincare routine. As long as you know what ingredients to look out for, good skincare products needn't cost you the earth & this serum is a great place to start.

Claudia Louch Mint Exfoliating Facial Polish*
I still maintain that chemical exfoliants are better than physical ones but if your skin is intolerant of acids then you can't go wrong with this lovely facial polish from Claudia Louch. This is a gentle sugar-based scrub with a whole host of plant extracts to nourish your skin naturally. The inclusion of apricot oil allows the scrub to smooth & cleanse the skin without drying it out. It sloughs off any dead skin to create a flawless base for makeup. You can use it directly on dry skin or mixed in with your regular cleanser. I prefer to mix it with my gel cleanser as it gets cleansing & exfoliating out of the way in one fell swoop. It has a gorgeous minty scent & really makes your skin feel tingly fresh. After washing it off my skin is left feeling velvety smooth & my complexion looks much brighter. It's a great way to improve your overall skin texture without the use of acids. The Mint Exfoliating Facial Polish is yet another truly brilliant product from the Claudia Louch Natural Skin Clinic.

Charlotte Tilbury Magic Foundation
Ever since trying her Light Wonder foundation I've been waiting for Charlotte Tilbury to come out with a fuller coverage option. Magic Foundation has been five years in the making & believe me, it was well worth waiting for. First off Magic Foundation comes in many more shades than Light Wonder with lighter lights, darker darks & plenty of others in between. I bought Shade 1 which is a neutral beige for very fair skin with cool undertones. The coverage is very buildable & no matter how much of it I slap on, it never looks cakey. The texture is quite thick but it feels weightless on the skin & perfects my complexion all day long. It immediately gives the appearance of smoother skin & contains several skincare ingredients to improve the condition of your skin in the long run. I much prefer this foundation to Light Wonder so kudos to CT for finally bringing us a high coverage base product. Magic Foundation is a fab addition to Charlotte Tilbury's ever expanding line up. It's not quite 'magic' but it certainly comes very close.

Anastasia Beverly Hills Illuminator in So Hollywood
Highlighters are totally my thing. I'm obsessed with the way they make my skin look & I cannot apply my makeup without sweeping a bit of shimmer across the high points of my face. I just don't feel right without it! Anastasia Beverly Hills is one of my favourite makeup brands so when they recently launched their powder Illuminators, I was all over it. Starlight is the shade recommended for pale skin but for some reason I really dislike white highlighters. I decided to get So Hollywood as the colour looked pretty similar to my bae, theBalm's Mary-Lou Manizer. Despite what others have said I think that this shade is perfectly suitable for fair skin. It looks incredible & gives me the most beautiful golden glow without being too yellow toned. I love this product so much! The Illuminators are supposed to be limited edition in the UK so make sure you don't miss out!


twitter / tumblr / youtube / instagram / bloglovin'