Showing posts with label makeup brushes. Show all posts

Thursday, 8 October 2015

Kiss Cosmetics Double Ended Lip Brush


Kiss Cosmetics Double Ended Lip Brush* - £5.50

At this time of year I love wearing bold lipsticks but they tend to be a little harder to apply than my usual pinks & nudes. Good application is key to pulling off really bright or dark lip colours. Something like black lipstick can make a real statement but if your edges are wobbly then the only statement it makes is that you suck at applying makeup. Using lipsticks straight from the bullet often doesn't yield the best results & if you want a professional looking finish then a lip brush is definitely the way to go. In the past I've used lip brushes from MAC & Real Techniques which I still think are brilliant. However Kiss Cosmetics have just brought out their revolutionary new Double Ended Lip Brush & in my opinion it is the ultimate tool for precision lipstick application.
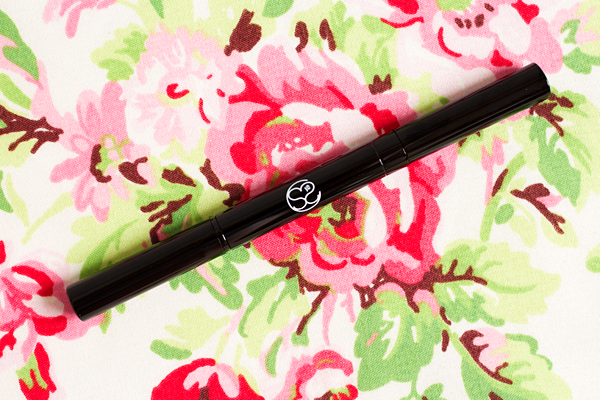
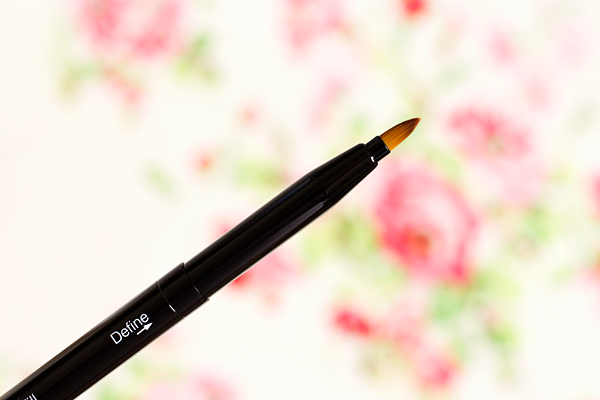
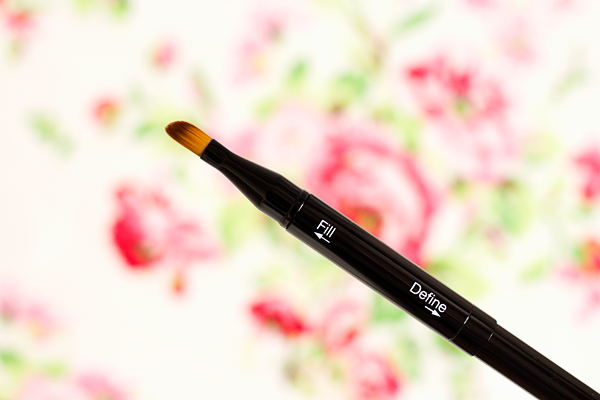


Having never seen or heard of a double ended lip brush before I did wonder whether it was really necessary. One brush is surely all you need to put some lipstick on? But if you struggle to get those super sharp edges then working with both ends of this brush can make all the difference to your makeup skills. The shapes of each end have been specially designed to ease application to the cupid's bow & the edges of your lips. On one end you get the Define brush which is pointed & perfect for lining the lips. You can get really crisp lines with this brush so it's great for lip art too. Lip brushes tend to get a bit messy but this side is retractable in order to keep the brush both hygienic & compact. It can also double up as an eyeliner brush! It's really handy to take out with you & saves space in your makeup bag. On the other end we have the Fill brush which has a unique angled paddle shape to fill in your lips & define your cupid's bow. The brush is wide enough to fill the lips without constantly needing to top it up with more product. It applies colour beautifully & blends your lipstick evenly for a truly perfected pout.
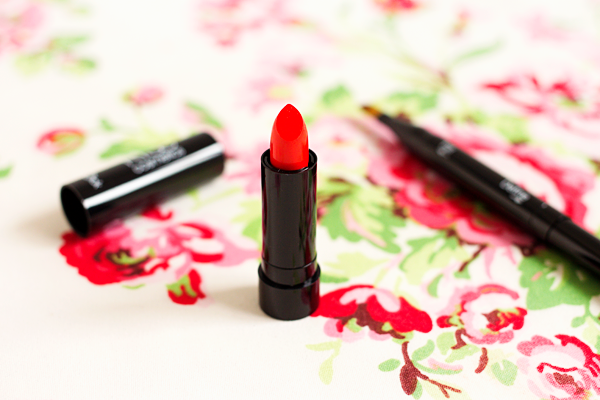
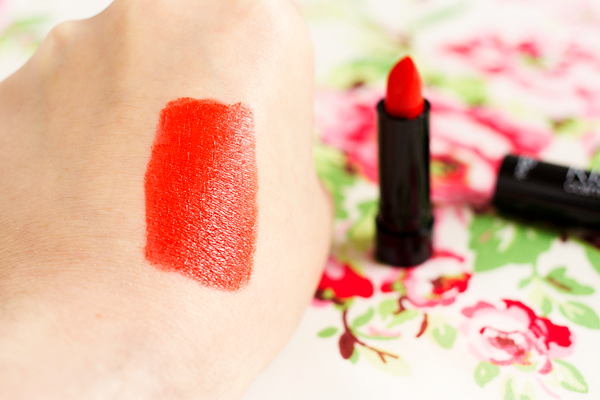
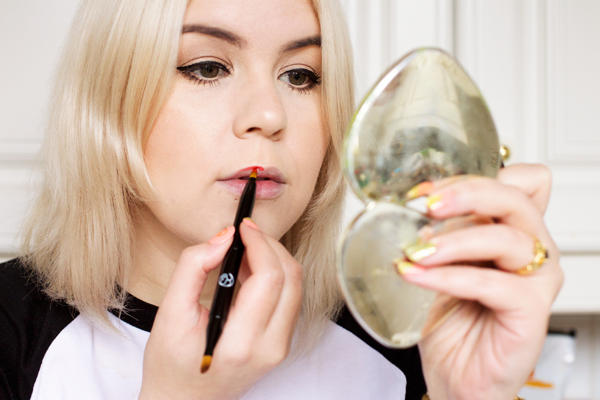
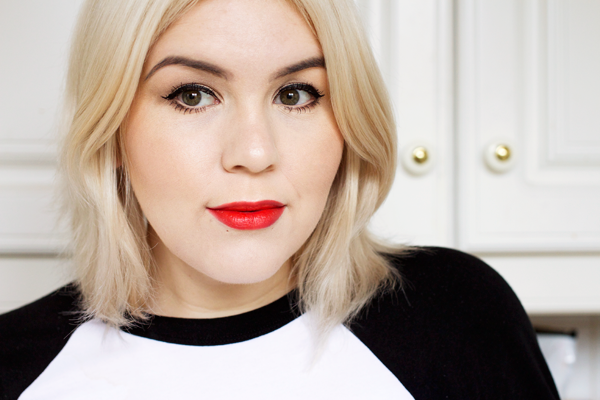
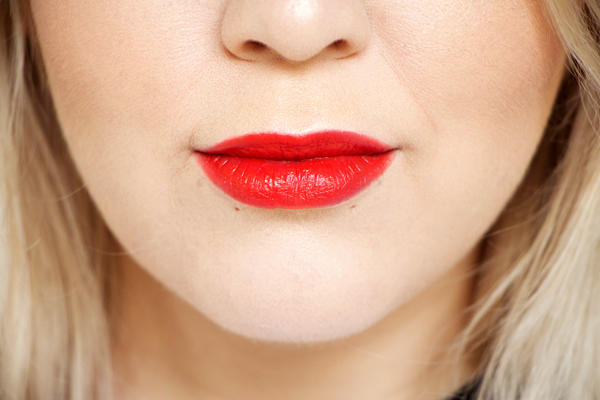


To test out the lip brush Kiss Cosmetics also sent me a Mini Kisstick in Magnetic Melon. This colour is to die for! It's a vibrant orangey-red that would look amazing on all skin tones. It also makes my teeth look a bit whiter which is always nice! The formula is both highly pigmented & moisture rich so it feels really comfortable to wear. This has to be one of the longest lasting lipsticks I've tried. Obviously it's not as hard-wearing as a liquid lipstick but for a traditional lippie it really stays put & leaves a bit of a stain so the colour fades evenly. I used the Define brush to line my lips with Magnetic Melon. When I normally apply lipstick I like to use a lip liner first but if you don't have a shade that matches your lipstick then this brush does exactly the same job. I was able to get some really clean lines with it & it works for overdrawing your lips too. Then I loaded up the Fill brush & applied the colour to the rest of my lips. One of my main concerns with bright lipstick is getting it on my teeth. With the Fill brush I was able to place the colour very precisely & as a result my teeth are totally lipstick-free! The finish is very smooth & even which makes a bold lipstick like this look even more stunning.

Kiss Cosmetics are definitely onto a winner with their ingenious Double Ended Lip Brush. It's a real game changer and works with lipstick, lip gloss, liquid lipstick & eyeliner. I'm obsessed with my Jeffree Star Liquid Lipsticks & this tool has made them so much easier to apply. I love how neat my lips look with the aid of these two brushes & in future I don't think I'll bother trying to apply a bright lipstick straight from the bullet. The Double Ended Lip Brush & Kissticks are both cruelty-free and available from www.kisscosmetics.co.uk.


twitter / tumblr / youtube / instagram / bloglovin'

Saturday, 2 August 2014

How To Spot Clean & Deep Clean Your Makeup Brushes


Cleaning your makeup brushes has to be one of the worst beauty related chores but it's also incredibly important. Dirty brushes carry a gross mix of old makeup, dead skin cells & bacteria which can lead to blemishes & infections. I'm definitely guilty of leaving a brush cleaning session until they've become too disgusting to use. The whole process is such a faff that I tend to only end up washing them once a month! For us super lazy girls a quick spot cleanse can make all the difference. Just don't forget to give them a deep cleanse every few weeks as well. Here's the lowdown on both brush cleaning processes...


SPOT CLEANING
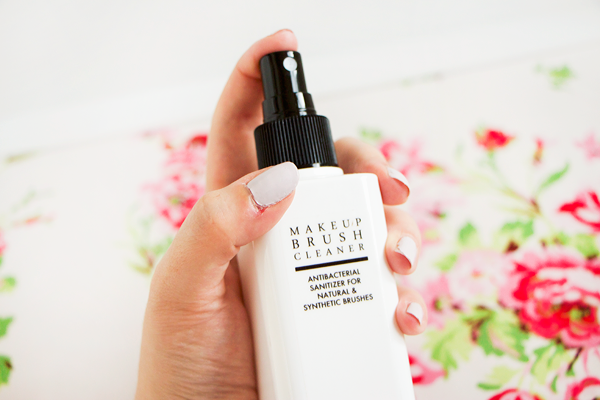
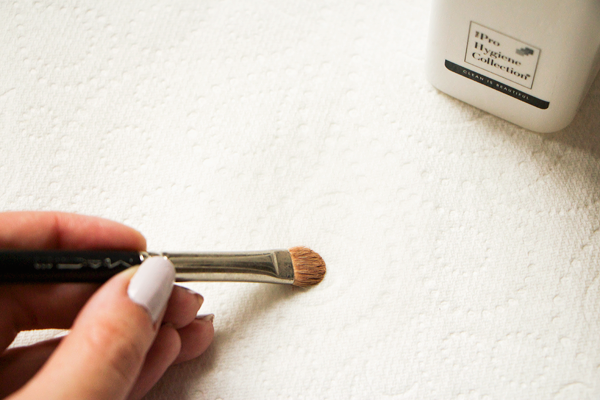
Spot cleaning your brushes is the quick & easy method. It works best on smaller tools like eyeshadow brushes. If you're lacking in the blending brush department & need to blend out your eye makeup with a clean brush then a spot cleanser is a great solution. There's plenty of these products on the market. Depending on your budget ELF, No7, Clinique & MAC's offerings are all good options. My current fave has to be The Pro Makeup Shop Hygiene Collection Makeup Brush Cleaner. It gets things clean in a flash but is still fairly cheap. To spot clean my brushes I simply spritz the cleanser onto some kitchen roll or directly onto the brush bristles & gently swirl my brushes in the product until all traces of makeup have been removed. A couple of minutes later my brushes are perfectly clean, dry & ready to use again. Spot cleansers tend to be quite alcohol heavy which can dry out & damage natural bristle brushes. They won't fully remove every trace of foundation either. That's why a deep cleanse is still needed. But if you want to temporarily make things a little less yucky then this method will keep everything sanitary enough to use.


DEEP CLEANING
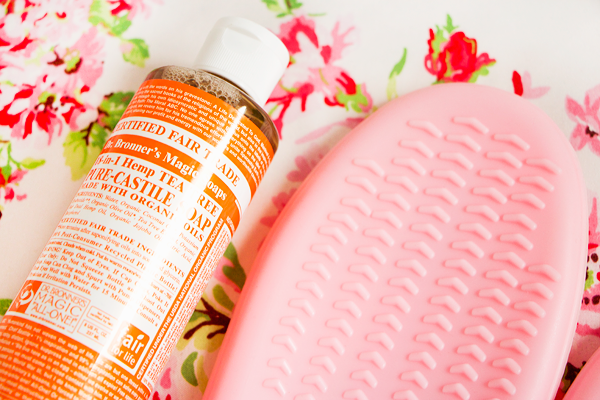
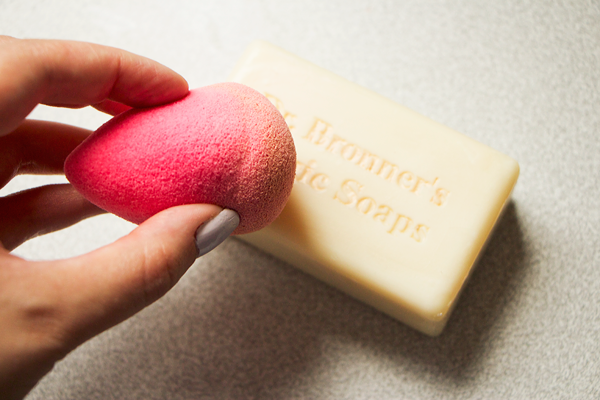
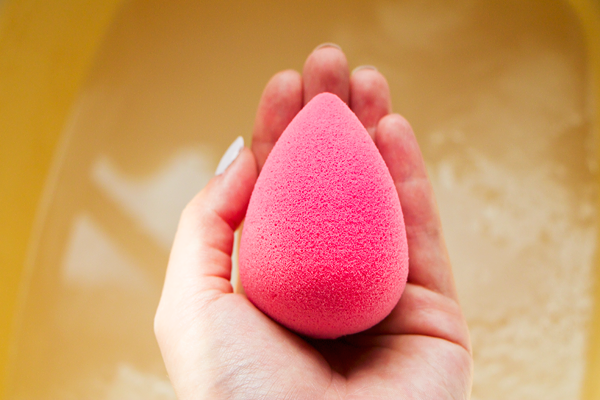
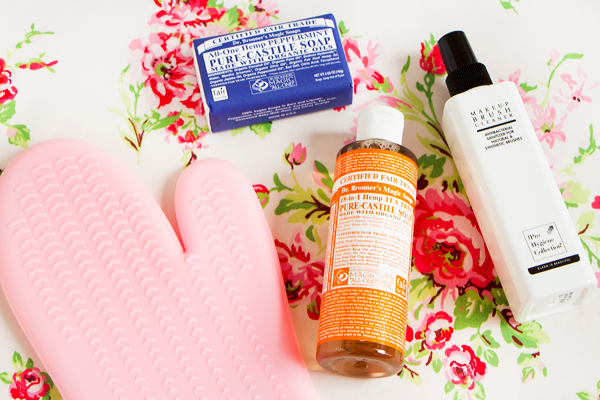
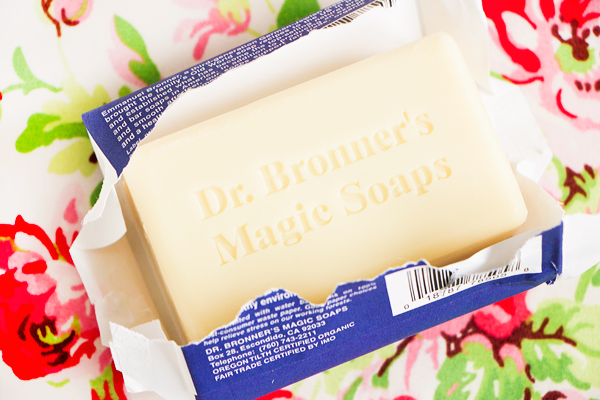
For a deep cleanse you can't beat Dr Bronner's soaps. The reason I recommend these over Fairy Liquid or regular bar soap is because they contain nourishing oils such as coconut, olive, hemp seed & jojoba so they'll condition your brushes as well as cleansing them. They come in loads of different scents but I prefer the minty ones such as Tea Tree & Peppermint as they make everything smell really fresh. Tea Tree is a natural antiseptic too so it's a good choice for staving off blemish causing bacteria. I really like both the liquid & solid soaps, it just depends which kind you prefer using. The liquid is better for bristle brushes and the solid one is better for sponges, powder puffs & densely packed brushes like the Sigma F80. I find that the solid one is a little less wasteful.

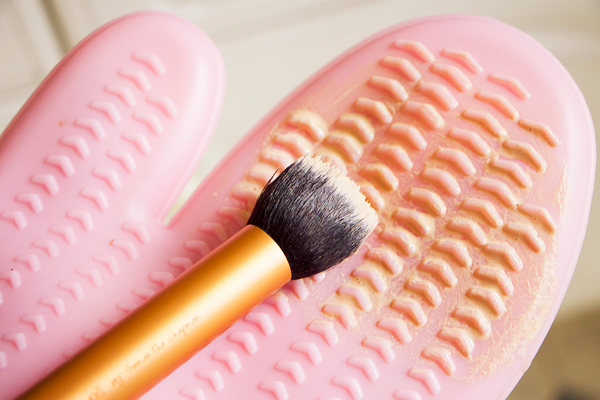
A lot of people will tell you to swirl your makeup brushes on your hand to get them clean & this always dried out my hands. If you have as many makeup brushes as I do, washing them takes a long time & subsequently wrecks my hands! Last year Sigma came out with a fancy brush cleaning glove which seemed a bit gimmicky at the time but it really does help to remove all of the ground-in dirt from your brushes. Then some clever cloggs realised that you can buy a silicone oven glove that does exactly the same job for a mere fraction of the price! I picked up my one from eBay and it makes brush washing so much quicker & easier. The glove protects your hands & the ridges tackle the grime so I'd definitely recommend buying one of these.


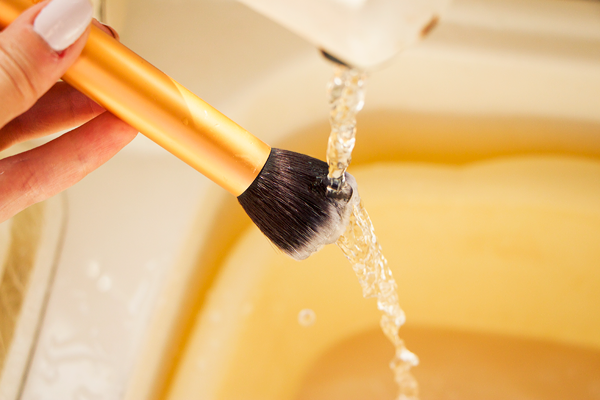
To give my brushes a deep clean first of all I wet each brush & swirl it in some of the liquid or solid soap. Then I rub it against the oven glove to lather it up. Rinse & repeat as required until all the makeup & soap has been completely washed away. Then just give the brush a final rinse under the tap being careful to hold the bristles facing downwards.


DRYING
When you've finally finished the washload, squeeze out the excess water & swirl them on a towel to dry them off a bit. Then either lay the brushes flat on a towel or balance them over the edge of a table, leaving them to dry overnight. Even better, if you've got the Real Techniques brush holders you can use the elastic in them to dry your brushes upside down. Never dry them with the bristles pointing upwards. This allows water to come into contact with the glue holding the bristles together which leads to shedding - my pet hate when it comes to makeup brushes! Once you get into the routine of washing your brushes regularly, it becomes a whole lot more manageable & less time consuming. I'm gonna try my best to keep mine as clean as possible from now on, pinky promise! It's a dirty job but someone's gotta do it...


twitter / tumblr / youtube / instagram / bloglovin'
Tuesday, 29 April 2014

Acrylic Makeup Brush & Pencil Storage


Acrylic Tube Organiser* - £14.99

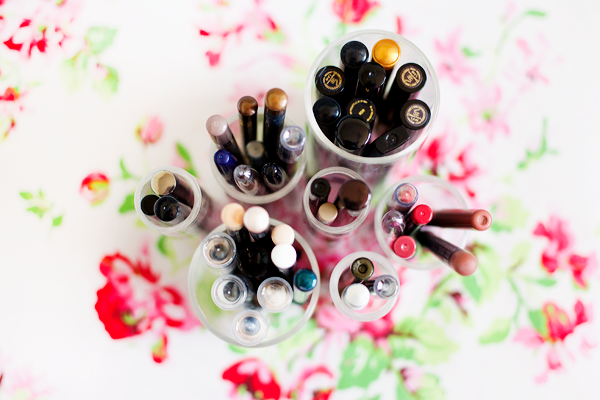
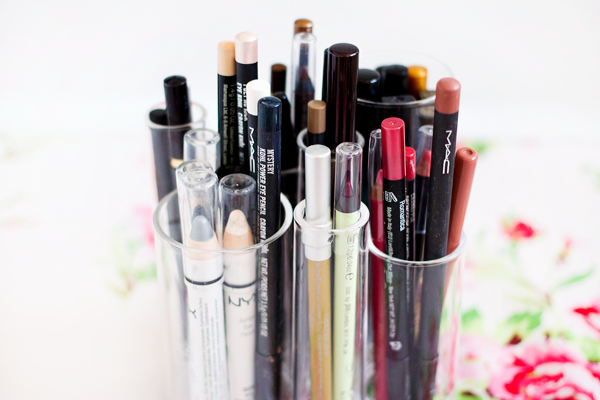
When you own a lot of beauty products it always pays to be organised. I like to give everything it's own special home so I know exactly where to find the things I'm looking for. Eye & lip pencils especially tend to get lost within my drawers & look a bit messy all jumbled up together. I've been looking for a nice storage solution for a while and I thought that this lovely acrylic tube organiser from Qwerkity would be perfect for them. Most people store their pencils in a single pot but I like this one because of all the separate tubes. It makes it much easier to organise the pencils by colour or type. When you group your products together like this it's clear to see what you have & what you don't actually need. I can't even begin to tell you how many black eyeliners I have. I always get loads of them from gift with purchase offers. It's definitely time for a beauty cull!


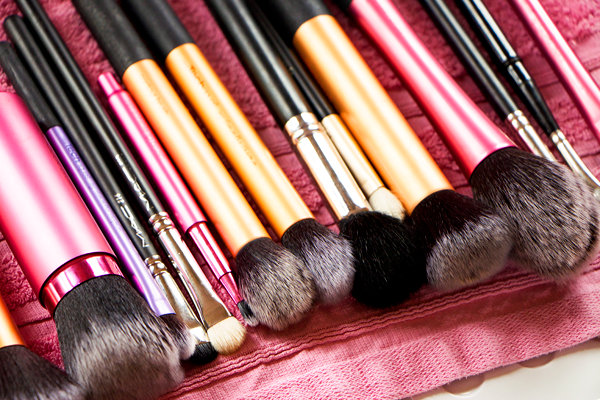
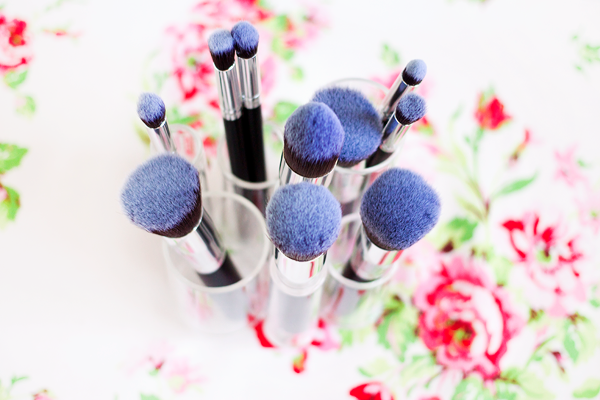
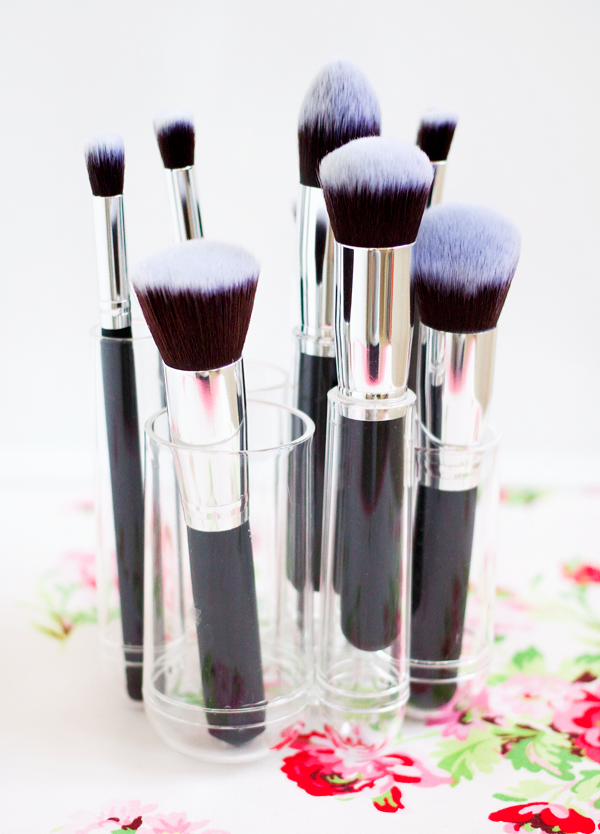
These tube organisers are also great for storing makeup brushes. I recently bought these ones from eBay as so many people have been raving about them lately. I've had bad experiences with buying cheap eBay brushes before where they've had a horrible smell, felt rough or shed like crazy. These are surprisingly good quality and I got all 10 for just £17. The price varies quite a lot on this same listing. Looking at it now, they're currently only £13! My other brush pots were getting a little too full so it's good to have another place to keep all these new ones. Although I personally consider Real Techniques to be a budget brush brand, it can get quite expensive if you buy every single one. If you're looking for something even cheaper but of a similar quality then I'd highly recommend buying these ones from eBay. They feel really soft & blend like a dream. The large kabuki brushes are brilliant for foundation. The flat kabuki is just like the wonderful Sigma F80 brush & the tapered kabuki reminds me of the Louise Young Super Foundation brush. The smaller ones are great for concealing, blending eye shadow or precision contouring. They're a must-have for anyone lacking in the brush department.


twitter / tumblr / youtube / instagram / bloglovin'
Tuesday, 4 March 2014

February Favourites


Illamasqua Hydra Veil
My current primer of choice is Hourglass Veil Mineral Primer & normally that is the perfect primer for me. My skincare routine normally ensures that I have no weird dry or flaky patches on my face but sometimes it can be unavoidable. I recently had a bad cold and that always results in bad skin for me. My nose gets really dry, red & sore when I'm poorly so I needed something extra to calm that down. Illamasqua Hydra Veil is a temporary quick fix for any dry or dehydrated areas. This clear gel will instantly cool & soothe your skin leaving it feeling plump & incredibly hydrated. You only need a tiny bit to sort out your entire face. After applying it you'll be able to get a completely smooth & flawless base whatever the condition of your skin. No dry flaky patches in sight!

Bumble & Bumble Thickening Creme Contour
I got my hair did a few weeks ago & I decided to go for a centre parting again. I had my hairdresser cut in some long fringey bits so I could flick them out to the sides. I wasn't too sure what kind of product to use to keep them in place. I'm generally not a fan of crispy hairspray & didn't want anything that would dry hard like a gel. Instead I've been using this Bumble & Bumble Thickening Creme Contour. This styling cream adds shape, texture & definition to my hair without weighing it down. It's lightweight yet offers a good enough hold to keep my style in place. It also makes my hair feel thicker & more voluminous. If you like really biiiig hair, combine it with their Dryspun Finish spray. You'll get some full, volumised locks with plenty of style.

Barry M Lip Gloss in Toffee
I always think of Barry M as a nail polish brand but there are a few gems to be found in the rest of their product range. I'm especially fond of their lip glosses. Toffee (#2) is my favourite shade. It adds a beautiful nude sheen to your lips when used alone & looks lovely on top of any pink lipstick. It smells delicious too! These glosses don't last too long on the lips but they feel really comfortable to wear without any horrible stickiness. It's a must-have for fuss-free nude lips.

Anastasia Brow Wiz in Medium Ash
I absolutely love Anastasia products. If you need a new eyebrow product then Anastasia should be your first port of call. This pencil is really great because it provides the convenience of pencil application with the natural finish of a powder. The nib is retractable & very fine so you can actually draw on individual hairs with it. It's just makes it so easy to get the exact brow shape you want without looking harsh at all. It even has a spoolie on the other end to groom your brow hairs & blend the product. The colour range is one of the best I've come across. I highly recommend buying this product!

Real Techniques Silicone Liner Brush
This brush is nothing new because Japonesque have made a silicone liner brush for quite some time. Real Techniques win though because theirs is cheaper, more readily available & works in exactly the same way. The easy to clean silicone tip allows me to get the perfect cat flick every time. It doesn't drag along the eyelid like some brushes or liquid liners can do. You can get such a smooth line with it & it's so easy to vary the shape of your flick or thickness of line. Obviously as it's not an actual brush, the tip won't hold much product. You do have to keep dipping it into your gel liner pot but I don't think that affects the application process at all. It's much more hygienic than a brush & should last for years to come.


twitter / tumblr / youtube / instagram / bloglovin'
Thursday, 20 February 2014

Real Techniques Retractable Brushes & Silicone Liner Brush


Real Techniques have completely taken over my brush collection. I still feel that MAC's eye brushes are far superior & I'll never give up my Sigma Tapered Highlighter Brush but for makeup brushes on any budget you can't beat Real Techniques. They are well made, soft, easy to clean & have never shed a single hair on my face. Real Techniques started off as Sam from Pixiwoo's brush line but now Nic is also a part of the team & these are the first brushes that they have designed together. Three of the new brushes are retractable & have a lid. If you're fed up of your makeup brushes getting squished at the bottom of your bag or just want to keep them clean then these are the perfect solution. The Silicone Liner Brush is another new addition & it's probably my favourite out of the four.


Real Techniques Retractable Kabuki Brush

Kabuki brushes should be a staple in everyone's brush collection. They're the ultimate multi-tasking brush. This brush can be used for liquid foundation, mineral foundation, setting powder, contouring or blush application. Personally I like to use this for precision powder application. It's my new favourite partner for my Hourglass Ambient Lighting Powders. It feels incredibly soft on the skin so it blends like a dream. The angled shape means that you can really get into the hollows of your cheeks & it works just as well on the apples of your cheeks. The longer handle makes this easier to use than the original Real Techniques Kabuki Brush. The bristles are softer, more densely packed & have a better shape so I'd definitely recommend buying this retractable one over the old one.


Real Techniques Retractable Bronzer Brush

I wasn't too sure about buying this brush because I've never used a bronzer in my entire life. I embrace the pale at all times. The shape & duo-fibre bristles reminded me of the MAC 187 brush so I decided to buy it anyway. Duo-fibres are great because the white bristles pick up the powder & the black bristles help to blend the product into the skin, giving you a beautifully blended, flawless finish. I used to use my 187 to stipple my liquid foundations & the Retractable Bronzer Brush works just as well for doing this. It does seem to suck up a bit more foundation though so you'll end up using more product. This chunky brush works really well with contouring powders to add some definition to your face. The bristles are not as densely packed as the other Real Techniques brushes. This helps you to get a light & natural finish but it lacks precision. I also tried using this with cream blushes & highlighters and I loved the result. It works brilliantly with the NARS Illuminators to add a gorgeous glow to your face. This brush is pretty huge though so I personally wouldn't take it out with me.


Real Techniques Retractable Lip Brush

Real Techniques carry a couple of small brushes that can be used as lip brushes. I normally go for the Detailer or Accent Brush. However this one is much better than either of those due to the inclusion of a lid. I think that lip brushes should always have some kind of lid or retractable feature. Otherwise you can easily end up with red lipstick smeared over everything else in your makeup bag. This keeps everything neat & hygienic. The shape is quite similar to the Detailer Brush found in the Core Collection but the tip is slightly more rounded. It's a great size & does it's job very well. I always need to top up my lippie throughout the day so this is such a brilliant brush for travelling with.


Real Techniques Silicone Liner Brush

First there came the Pixel Point Eyeliner Brush in the Starter Set - it was rubbish. Things were much improved with the launch of the Fine Liner Brush. Finally we have the new Silicone Liner Brush which is easily the best Real Techniques eyeliner brush currently available. Instead of being an actual brush, this has a soft pointed silicone nib. The tip is very fine so you can get right up to your lashes with it. It doesn't drag along the eyelid at all resulting in super smooth liner application. I can vary the thickness of line or shape of my flick with the greatest of ease. The silicone material makes it so easy to clean. If you don't own a gel liner you can just mix an eyeshadow with water or Illamasqua Sealing Gel & this brush will do the rest. It is a truly fantastic addition to the Real Techniques range.

In general I find that the individual Real Techniques brushes tend to be better quality than the sets & these new additions definitely do not disappoint. The retractable brushes might be seen as gimmicky but it's a genuinely helpful feature that makes them both portable & hygienic. I wasn't too sure about the Bronzer Brush to begin with but I would thoroughly recommend buying all of these brushes. If you ever do your makeup on the go or are staying over at someone else's house then these brushes would be indispensable to you. I ended up ordering mine from Love Makeup because my local Boots were being slow. I have since seen them in many branches of Boots so it should be much easier to get your hands on them by now!


twitter / tumblr / youtube / instagram / bloglovin'

Wednesday, 10 April 2013

What's In My Makeup Bag?


I store all of my makeup collection in some acrylic drawers from Homebase but I keep the stuff I tend to wear on a daily basis inside my makeup bag. I bought this from MAC a few years ago & it's still going strong. It is the signature medium rectangle bag. It's a good size as it can hold a lot of stuff and has a separate pocket to keep my brushes in. I tend to keep far too many things in here as I like to have a little bit of choice when it comes to what I'm gonna use that day. I would clear some of the products out but I just like too many things! Anyway here's a little peak at some of my most used makeup products.


Dr Jart+ Water Fuse BB Cream / Laura Mercier Silk Creme Foundation / Laura Mercier Foundation Primer
By Terry Touche Veloutee / Collection 2000 Lasting Perfection Concealer / Bobbi Brown Creamy Corrector
Kevyn Aucoin Sensual Skin Enhancer

I keep a couple of different base products in my bag to use depending on how my skin is behaving & how much time I have to get ready. If I have time I prefer to use the Laura Mercier Silk Creme applied with a Beautyblender. If I'm running late a blob of the Dr Jart BB cream mixed with a tiny dot of the Kevyn Aucoin Sensual Skin Enhancer helps to even out my skin and hide some of my blemishes & scarring. The BB cream alone is far too dark & sheer for me so adding the Sensual Skin Enhancer lightens it up & adds a bit more coverage. I use a few different concealers but tend to just go for some of the Bobbi Brown Creamy Corrector under my eyes most days.


Clarins Instant Smooth Perfecting Touch Primer / Illamasqua Naked Rose Blusher / NARS Deep Throat Blusher / theBalm Mary-Lou Manizer / MAC Omega Eyeshadow / Urban Decay Naked Basics Palette

As well as the Laura Mercier Foundation Primer I also keep the Clarins Instant Smooth one in my bag. The Clarins primer is better if I want to hide my pores & smooth over my skin so I use this one more often. I love blushers & have tons in my collection but the ones I've been using most are NARS Deep Throat & Illamasqua Naked Rose. They're both nice peachy pinks that add a much needed burst of colour to my complexion. My go-to highlighter is theBalm's Mary-Lou Manizer, I recommend this product for anyone who wants a highly metallic sheen to their skin. It's one of the most pigmented I've tried & really makes my skin glow. I use the Urban Decay Naked Basics palette every day as it's a great selection of neutral colours that are ideal for day or night. If I fancy using a powder to fill in my eyebrows I opt between the shade Naked2 from this palette and MAC's Omega eyeshadow.


Givenchy Noir Couture Mascara* / MAC Clear Brow Set / NUXE Reve De Miel Lip Balm / Lancome Hypnose Doll Eyes Mascara / Benefit They're Real Mascara / MAC Fling Eye Brow Pencil / Anastasia Granite Tinted Brow Gel / Clinique Bottom Lash Mascara / Beaute Girlina Weightless Lip Creme / L'Oreal Carbon Gloss Superliner / Revlon Strawberry Shortcake Lip Butter / Urban Decay Eyeshadow Primer Potion / MAC NC15/NW20 Pencil
LORAC Front Of The Line Pro Eyeliner / SUQQU Eyebrow Liquid Pen

I have four mascaras in here which is probably overkill! At the minute I like to layer the last dregs of my Lancome Doll Eyes mascara with Benefit They're Real mascara and then use the Clinique mascara on my bottom lashes to stop them smudging. I didn't really like They're Real to begin with but it's starting to get better as it dries out a bit. Still clinging on to the Lancome one though! There's some more eye brow products here depending on how I want them to look. I love brushing on some of the Anastasia Tinted Brow Gel when I don't have time to fill them in properly. I have lip products galore but I tend to go for the Beaute Lip Creme or Revlon Lip Butter as I do love a nice pink lip. I use the L'Oreal Superliner to do my regular cat flick but the LORAC one is amazing for really thin lines. I use this to fill in any tiny gaps, neaten the end of the flick & sometimes I draw on bottom lashes with it a la Twiggy. And I can't go a day without using my MAC NC15/NW20 pencil on my lower lash line to brighten up my eyes.


Real Techniques Buffing Brush / Real Techniques Contour Brush x2 / Real Techniques Setting Brush / Sigma Tapered Highlighter Brush / Real Techniques Brow Brush / Laura Mercier Double Ended Eye Brow Brush / MAC 239 Brush / MAC 222 Brush / MAC 219 Brush / MAC 227 Brush / Tweezerman Tweezers / Shu Uemura Eyelash Curler

I keep a few essential brushes in here but often dip into my brush pots when I'm getting ready. I typically apply foundation with a Beautyblender (but I keep that in a separate jar) or the Real Techniques Buffing Brush. I always keep two of the Contour Brushes in here - one for blending concealer & one for applying blusher. I use the setting brush with some loose powder to set under my eyes and the Sigma brush to apply highlighter. There's two angled brushes in here but they're quite different, the Real Techniques one is better for lining my eyes with black eyeshadow & the Laura Mercier one is my favourite eye brow brush. The bristles are a lot stiffer so it works a lot better. I also keep several eyeshadow brushes in here but I probably use the MAC 219 the most as I like to apply some brown eyeshadow under my eyes with it. Finally I have my tweezers & eyelash curlers, total essentials for me & you can't get better than Tweezerman & Shu Uemura.


twitter / tumblr / youtube / instagram / bloglovin'
Wednesday, 6 February 2013

Easy Contouring Products


Illamasqua Hollow Cream Pigment - £17 / Sleek Face Contour Kit - £6.49 / MAC Harmony Blusher - £17.50
NARS Douceur Blusher - £21 / Louise Young LY20 Super Fan Brush - £26

As the not so proud owner of a big roundy moon face I do like to contour my cheekbones now and then. I've always longed for a makeup technique that could slim my face down a tad (or to just have a less round face!) and it was only when I started watching YouTube makeup tutorials a few years ago that I discovered contouring. I find it fascinating to watch people's face shape change just by adding some brown powder underneath their cheekbones & jawline. Its something I've always struggled with though as it can be hard to find a contour colour that isn't too orange & a brush that doesn't make me look like I have an orange beard. I love Illamasqua Cream Pigment in Hollow because it solves both of those problems in one go. Its the perfect colour for my skin & a quick swipe with my fingers allows for precise application. Its easily blended out and has superb staying power for a cream product. If you like the texture of Chanel Soleil Tan De Chanel but find the colour too warm for you then Hollow Cream Pigment is a fab cool toned alternative.

If I'm going for a powder contour product then I really like the Sleek Face Contour Kit in Light. Light is quite a deceptive name as it is still a fairly dark colour but with enough blending it can look great. It is slightly warm in tone but most people would probably welcome the effect that gives. Sleek also make a Face Form Contour Kit which includes a blusher for just £10. I also like MAC's Harmony Blusher for a matter product but with the same warmth. It can be a bit dark on me so again lots of blending is key here. A lot of people rave about the Bourjois Chocolate Bronzer but that was far too dark, orange & glittery for me. Same goes for NARS Laguna Bronzer. A NARS product that I do think works for contouring is their Douceur Blusher. It offers subtle colour and definition to the cheeks in one. Use it to sculpt the sides of your face rather than applying it to the apples of your cheeks. Its also very sheer so its hard to overdo it. The amount of pink in this product makes it look very natural, almost as if you were born with those cheekbones!

I've tried to contour my face with a lot of different brushes in the past. Various MAC MUA's had promised me that if I bought the rather expensive 138 or 168 brushes then my contouring troubles would be over but both left me with orange beard syndrome & a big hole in my bank account. I know a lot of people like it for contouring but I prefer to use the Real Techniques Contour Brush for blusher & concealer. I still really like the MAC 109 brush but no brush is as easy to use as the Louise Young LY20 Super Fan Brush. Seriously, it is an absolute dream! Its really well made & the bristles are so soft. The extreme width & fluffiness of this brush means that it is brilliant at blending. The shape allows you to follow the natural contours of your face with great ease. I just tap the very middle of the brush into my chosen contouring powder and the clean ends on either side blend it out perfectly. Using the LY20 is almost like Contouring For Dummies. I cannot emphasise enough just how foolproof this brush is. It can also be used to apply highlighter & setting powder so this brush is an absolute must have for me. If contouring is something you find difficult then this wonderful Louise Young brush could be the exact product you need in your arsenal.