Wooden advent calendars are becoming increasingly popular at this time of year. They give you the chance to spoil your loved ones with more than just a tiny chocolate every day as you count down to Christmas. Not only are they a wonderful pre-Christmas gift, they work as a charming festive decoration for your home during the holiday season. Like every popular Christmas item, it can be difficult to get your hands on one. Aldi had a stunning calendar for only £8.99 but they sold out almost instantly & I certainly wouldn't waste £64.95 on Harrods' offering! I love getting a bit crafty at Christmastime as I think that handmade personalised gifts are the best. I decided to try my hand at making a wooden advent calendar for Chloe. Last year she had a Lego advent calendar which came with a new Lego toy every day. This year's Lego calendar didn't look like much fun so I figured I could fill a wooden calendar with toys that she'll really love instead. I think that the finished calendar looks absolutely gorgeous & just as good as something you'd buy in the shops! Here's how I made my wooden advent calendar...
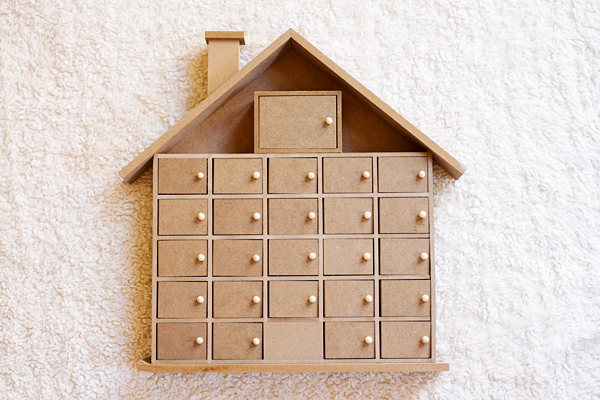
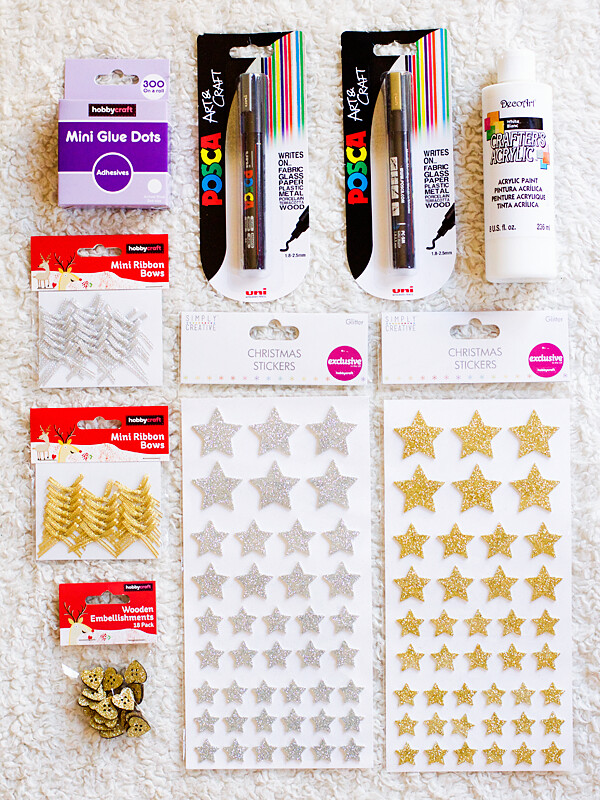
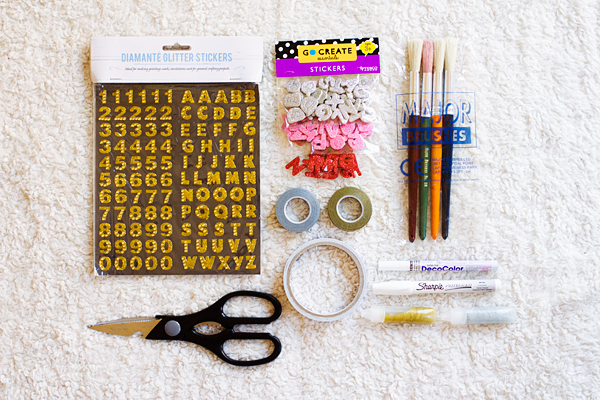
Makers of lockers for schools, Action Storage sent me one of these blank wooden advent calendars from Hobbycraft & a £20 gift voucher to buy some decorative supplies. I decided early on that I wanted to do a white house with gold & silver accents. I went to Hobbycraft in Leeds & although they had plenty of the calendars still in stock, the decorations were in short supply. They had hardly any numbers available for the advent doors so the shop assistants suggested I just drew them on instead. I picked up some gold & silver Posca pens for this purpose but I found these gold stickers in Chloe's craft box at home which were the perfect size. As I only had gold numbers I decided not to include any silver elements to make the overall design more cohesive.
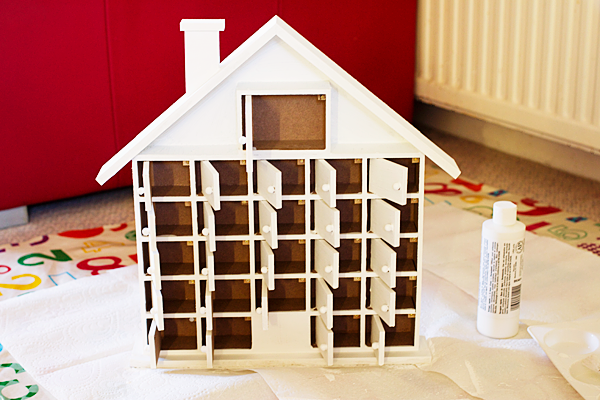
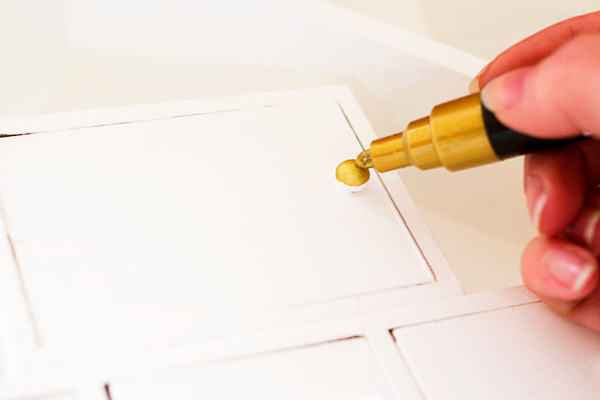
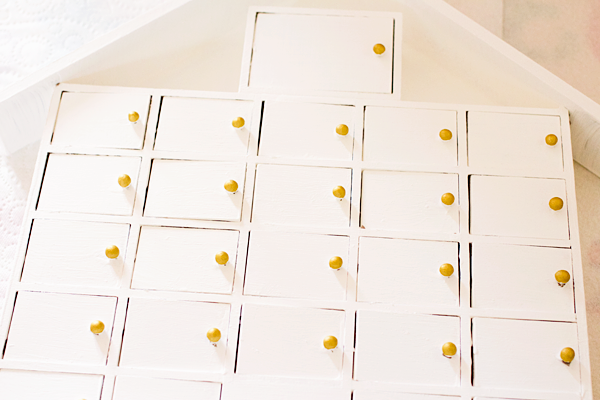
I started my advent calendar design by covering the entire house with white acrylic paint. I used a really cheap paintbrush which made the paint look quite streaky so I had to do two coats for full coverage. It's important to leave the doors open after painting them otherwise they can get stuck! Next I used the gold Posca pen to colour in the doorknobs. I really like these pens, the colour looks great & they dry very quickly.
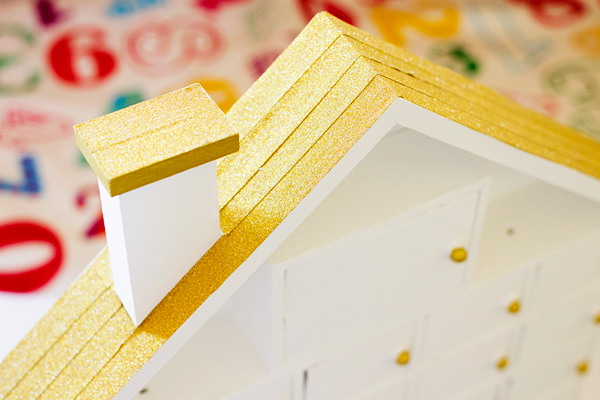
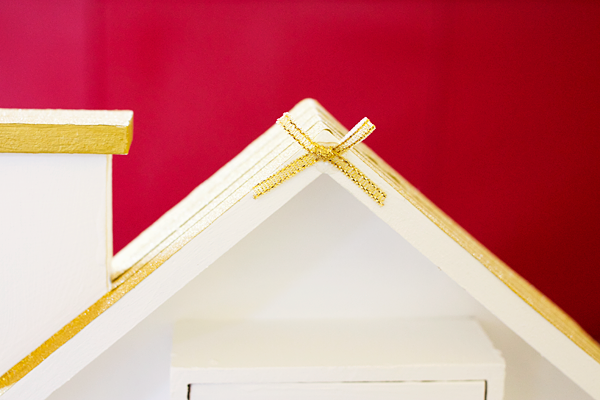
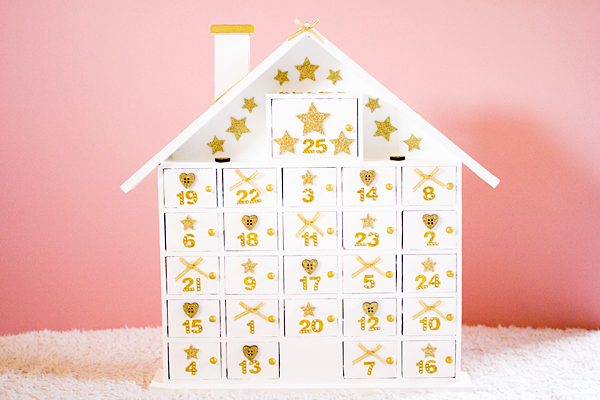
Next I decided to work on the roof. I had wanted to cover it with glitter but the tubs of glitter in Hobbycraft cost about a tenner so I just used some gold glitter washi tape that I bought on Amazon instead. The lines between the tape give the effect of roof tiles so I was happy with how this turned out. I also stuck a little gold bow in the centre because I thought it looked cute!
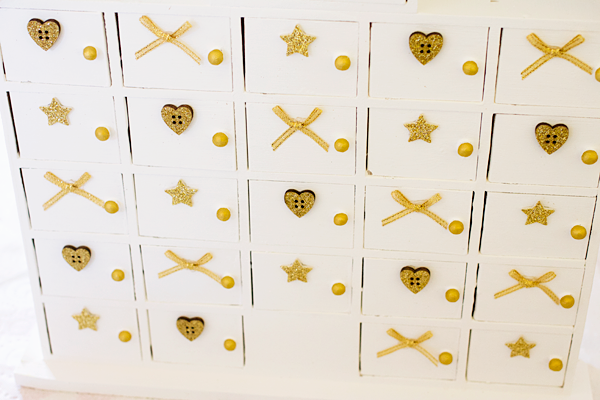
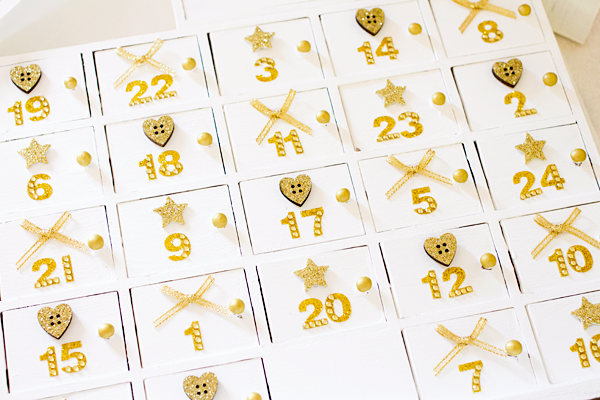

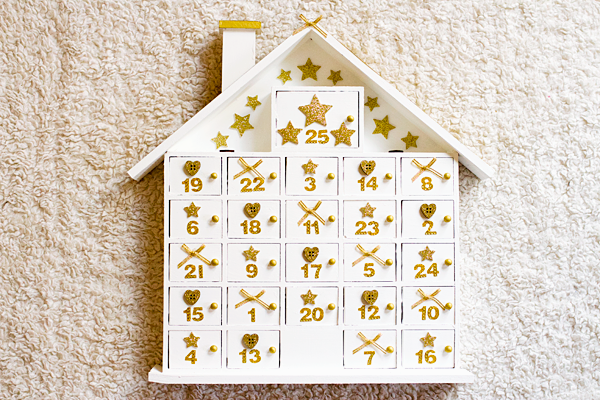
The doors are the most important part of the calendar so I wanted them to look really good. I like simplicity in design & because there are so many elements to this calendar I didn't want to overcrowd the doors. I decided to use the glitter stars, the glitter heart buttons & the gold bows. I didn't want to bother with a hot glue gun so I used glue dots to affix all the different elements to the calendar. I then stuck on all the number stickers underneath. You get a bigger door for the 25th so I stuck on three larger stars to make it look really special.
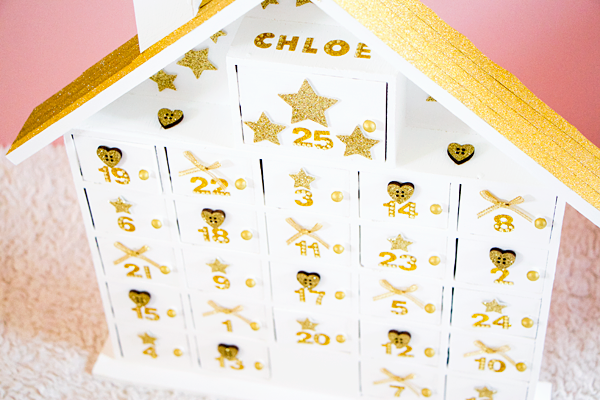
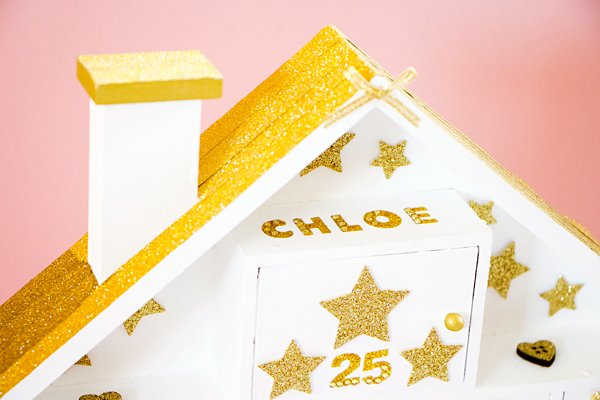
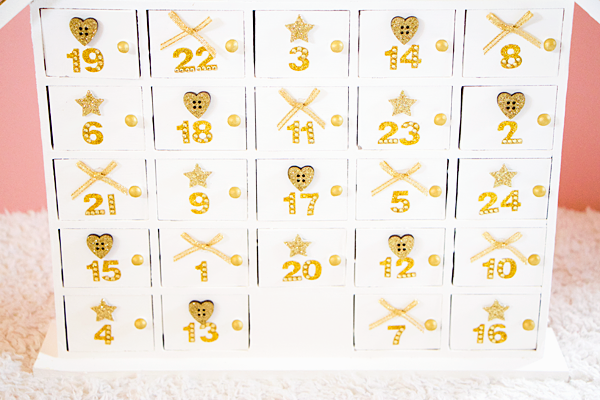
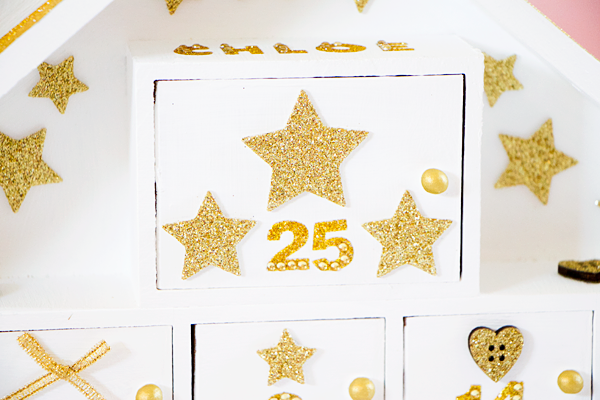
I finished off the top section with some more stars & a couple of heart buttons to hide the wood joints. I also put Chloe's name on top of the 25th door to further personalise the design. I'm so pleased with how it turned out! It looks super cute & very Christmassy. I love anything gold & sparkly so I think the colour scheme is perfect. Chloe absolutely loves her advent calendar & she can't wait to open the first door tomorrow!
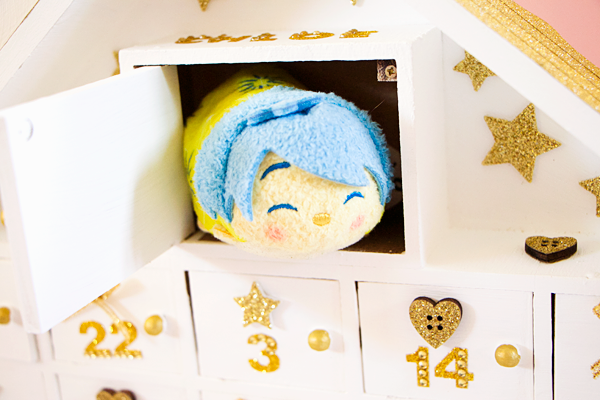
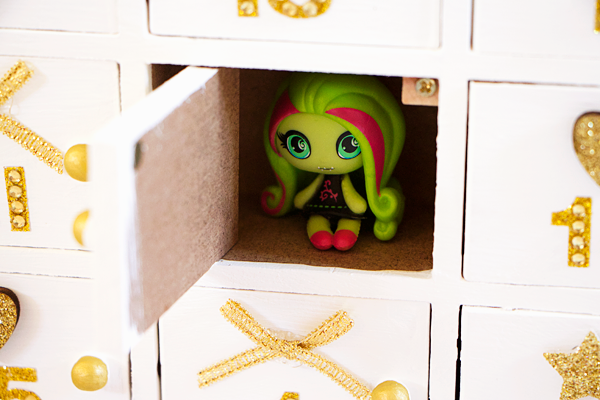
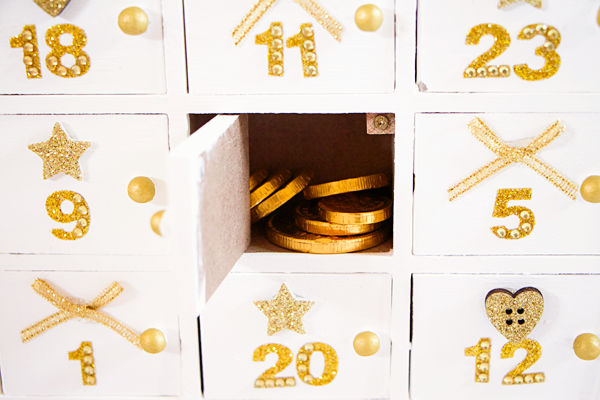
As for the contents of the calendar it's totally up to you! This calendar would be a fantastic present for any of your friends or family. You could do a beauty one with things like eyeshadow pans, lip balm & nail polish. Chloe's obsessed with things like Monster High Minis & Shopkins which both fit perfectly inside the doors. I even managed to cram in a Tsum Tsum for Christmas Day! You don't have to spends loads of money either. In some of the doors I've placed chocolate coins & mini chocolate bars but she's most excited about the toys! I really enjoyed making this calendar & it's something that I'll look forward to bringing out every Christmas with new surprises tucked behind each door.
Makers of lockers for schools, Action Storage sent me one of these blank wooden advent calendars from Hobbycraft & a £20 gift voucher to buy some decorative supplies. I decided early on that I wanted to do a white house with gold & silver accents. I went to Hobbycraft in Leeds & although they had plenty of the calendars still in stock, the decorations were in short supply. They had hardly any numbers available for the advent doors so the shop assistants suggested I just drew them on instead. I picked up some gold & silver Posca pens for this purpose but I found these gold stickers in Chloe's craft box at home which were the perfect size. As I only had gold numbers I decided not to include any silver elements to make the overall design more cohesive.
I started my advent calendar design by covering the entire house with white acrylic paint. I used a really cheap paintbrush which made the paint look quite streaky so I had to do two coats for full coverage. It's important to leave the doors open after painting them otherwise they can get stuck! Next I used the gold Posca pen to colour in the doorknobs. I really like these pens, the colour looks great & they dry very quickly.
Next I decided to work on the roof. I had wanted to cover it with glitter but the tubs of glitter in Hobbycraft cost about a tenner so I just used some gold glitter washi tape that I bought on Amazon instead. The lines between the tape give the effect of roof tiles so I was happy with how this turned out. I also stuck a little gold bow in the centre because I thought it looked cute!
The doors are the most important part of the calendar so I wanted them to look really good. I like simplicity in design & because there are so many elements to this calendar I didn't want to overcrowd the doors. I decided to use the glitter stars, the glitter heart buttons & the gold bows. I didn't want to bother with a hot glue gun so I used glue dots to affix all the different elements to the calendar. I then stuck on all the number stickers underneath. You get a bigger door for the 25th so I stuck on three larger stars to make it look really special.
I finished off the top section with some more stars & a couple of heart buttons to hide the wood joints. I also put Chloe's name on top of the 25th door to further personalise the design. I'm so pleased with how it turned out! It looks super cute & very Christmassy. I love anything gold & sparkly so I think the colour scheme is perfect. Chloe absolutely loves her advent calendar & she can't wait to open the first door tomorrow!
As for the contents of the calendar it's totally up to you! This calendar would be a fantastic present for any of your friends or family. You could do a beauty one with things like eyeshadow pans, lip balm & nail polish. Chloe's obsessed with things like Monster High Minis & Shopkins which both fit perfectly inside the doors. I even managed to cram in a Tsum Tsum for Christmas Day! You don't have to spends loads of money either. In some of the doors I've placed chocolate coins & mini chocolate bars but she's most excited about the toys! I really enjoyed making this calendar & it's something that I'll look forward to bringing out every Christmas with new surprises tucked behind each door.

twitter / tumblr / youtube / instagram / bloglovin'