Showing posts with label new nails. Show all posts

Thursday, 21 May 2015

DIY Nails Candy Nailcals


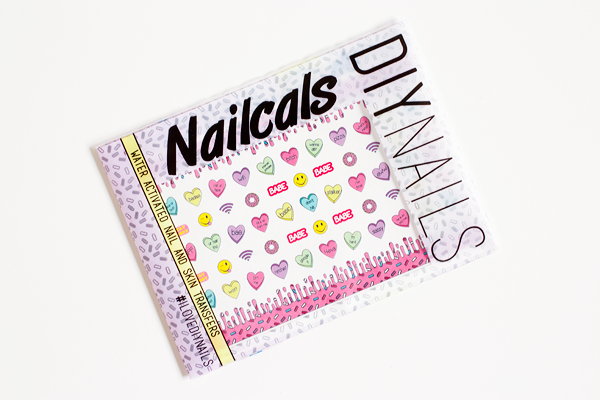
DIY Nails Candy Nailcals* - £6

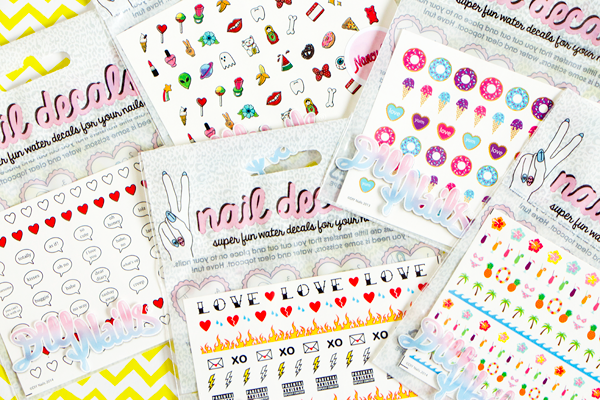
DIY Nails have had a bit of a makeover since I last featured them on here and their range of water-activated nail decals just keeps on getting better & better. As well as their super cute nailcals, they now have some amazing foil designs for ultra-profesh nail art that you can do at home. You can even put them on your skin as temporary tattoos! If you've never tried nail decals before then you're really missing out. Although hand-painted nail art can look stunning, it's really difficult to do it on yourself. I consider just painting my nails with my non-dominant hand to be a struggle so there's no way that I could ever manage any kind of intricate design on them! With these decals you can have something unique & creative on your nails without any of the technical skills.

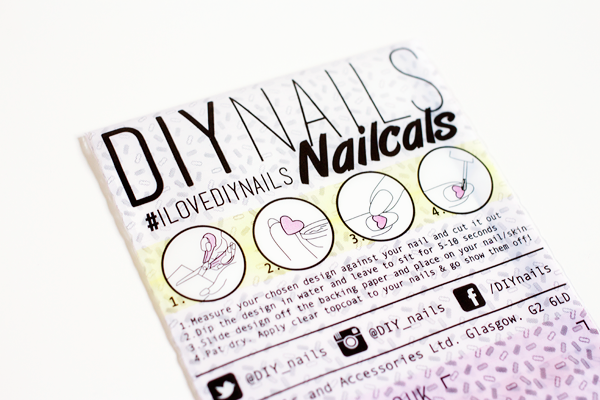
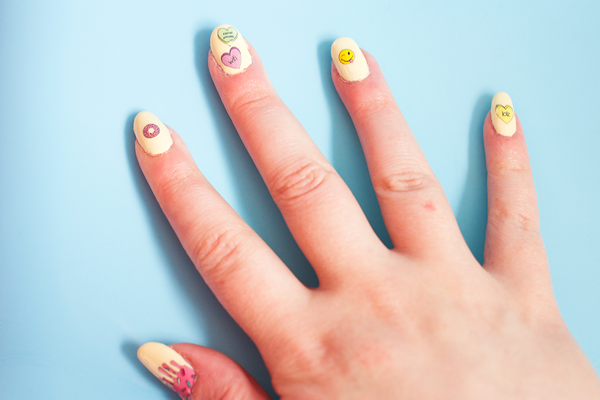
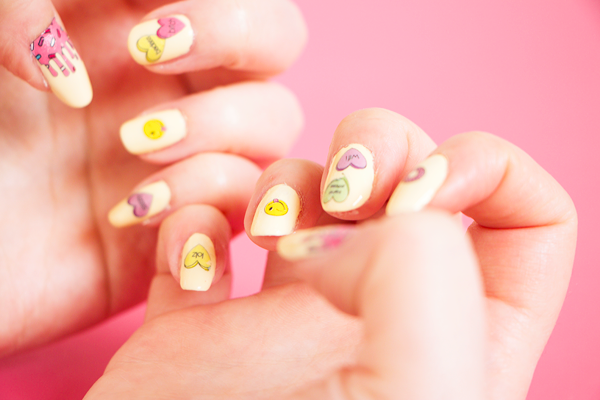
I was recently sent a set of the adorable Candy Nailcals which features a colourful array of tumblr-esque candy hearts, smiley faces, wifi symbols, icing & sprinkles. To complement all the pretty pastel colours, I decided to paint my nails using Model's Own Lemon Meringue. Decals tend to work best with lighter colours of nail polish & I think that this set looks fab against the yellow. Application is incredibly simple. All you need are some scissors, a bowl of water & a clear top coat. After cutting out your chosen designs, pop them in the bowl of water for about 10-20 seconds, then they'll slide off the backing paper & onto your nails. I always place the transfer at the base of my nail as I find it easiest to slide them upwards into position. Gently pat your nail dry with some kitchen roll & apply your clear top coat. The top coat stage is key because it makes the decals look seamless on your nails & seals them into place. Be very careful with the polish brush though because it can sometimes tear the decal if you press down too hard. My green 'internet princess' love heart got a little bit damaged this way!

My favourite design in this pack has to be the dripping pink icing with sprinkles that I have on my thumbs. I was worried that they would be fiddlier to apply than the smaller decals but I actually found them a lot easier to put on. Next time I think I'll do my whole manicure with them. That's one of the best things about these decals - even though I've put loads of them on my nails, I can still get many mores uses out of this one sheet. I've had so many compliments on my nails this week! Everywhere I go I keep getting people asking me for a closer look & marvelling at these amazing little illustrations. Pop over to the DIY Nails website & your nails need never look boring again!


twitter / tumblr / youtube / instagram / bloglovin'

Friday, 5 December 2014

Only Fingers + Toes Nail Beautique At Harvey Nichols Manchester


On Monday I was invited up to Manchester for a manicure at the Only Fingers + Toes Nail Beautique in Harvey Nichols. I can't remember the last time I had a proper salon manicure so I was really excited to go & see all the beautiful polishes that O.F.A.T. have to offer. Only Fingers + Toes have an ever-growing library of luxury 5-free polishes. They bring out new colours & finishes every season so their collection is always on trend. Their brushes have been designed to give perfect 3-stroke, long-lasting, lustrous coverage with ergonomically designed handles for maximum comfort & usability. They also have a comprehensive range of nail care products to ensure salon-style results and beautifully conditioned hands & feet. Their nail bar is tucked away in the corner of the ground floor of Harvey Nichols so the atmosphere is very calming. It is situated next to a couple of other treatment areas in the main beauty hall including the Umberto Giannini Hair Salon & Shavata Brow Studio so you could have a full-on pamper day here if you wished. The Nail Beautique has a white minimalistic design & everything looks very chic. The staff were all super friendly & made sure I had a really enjoyable experience.

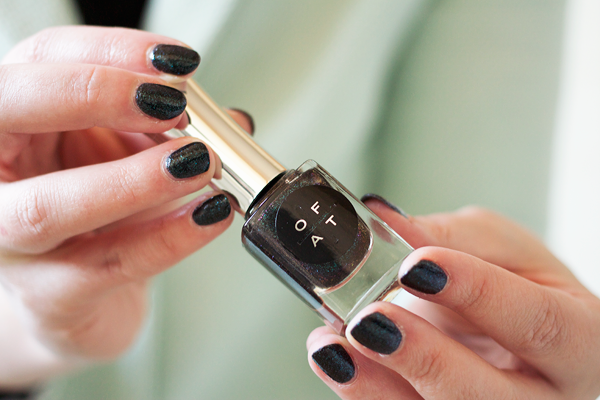
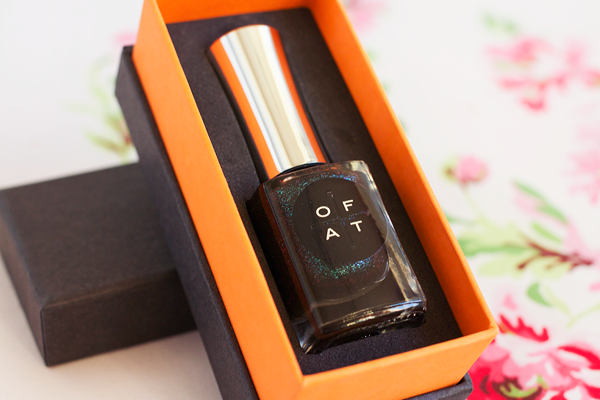
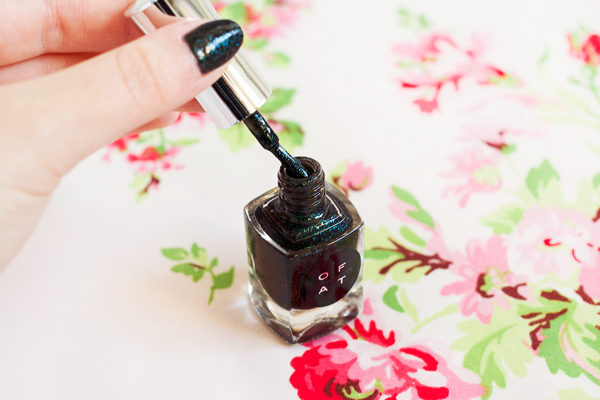
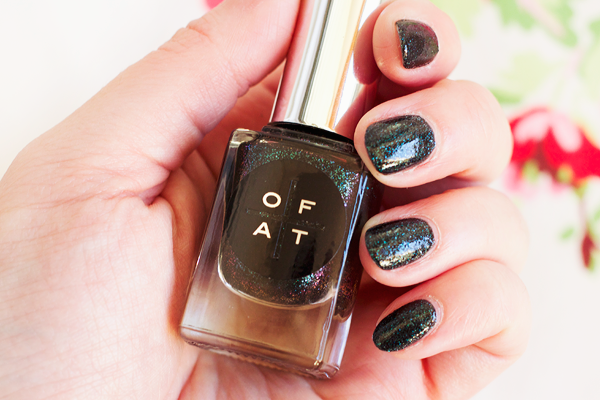
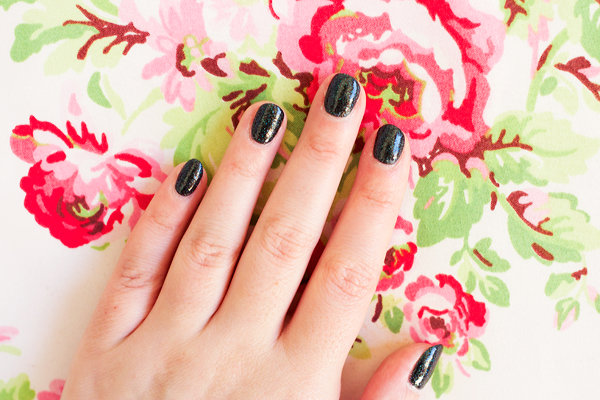
I had the Classic Therapy treatment which began with me choosing my nail polish. I went for Nitrogen from their Autumn/Winter Elements collection. It's a deep, dark gunmetal blue with festive green sparkles. Their glitter polishes are absolutely stunning, all densely packed and multi-faceted. My nails were shaped and buffed to perfection using a glass file before my hands were placed into some gloves containing a warm keratin treatment. This was one of my favourite parts of the manicure because it just felt so lovely. Much like a keratin treatment for your hair, these keratin gloves help to promote nail growth & strength whilst making your hands feel unbelievably soft. It also helps to soften your cuticles so that they can be cut & pushed back with ease. A stress melting oil hand massage followed which felt so relaxing. Then two layers of Nitrogen sandwiched between a base & a top coat were applied to my nails. My treatment was finished with some quick drying nail drops & some more oil around my cuticles. I'm so pleased with the manicure! The treatment was wonderful & I absolutely adore the polish I picked out. I struggle to find the time to maintain my nails properly so being able to leave it to a professional was brilliant. I'm thinking this might have to become a more regular occurrence!

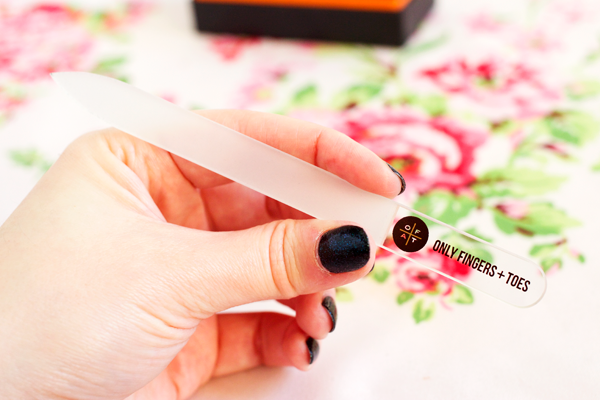
After my manicure I was kindly treated to a bottle of their Nitrogen nail lacquer & a glass nail file. In the bottle the colour is reminiscent of an oil slick but on the nails it looks more like a semi-matte black brimming with forest green glitter. Nitrogen is actually textured which is a really interesting finish and unlike anything else in my collection. A glossy top coat will smooth it over though if that's what you prefer. It's perfect for the Christmas party season, classy but with an element of fun. The formula of this polish is outstanding. It is completely opaque in two coats which is impressive for a glitter polish. I've had minimal tip wear with no chips whatsoever. It simply stays put. At £16 per bottle you definitely get what you pay for. Each polish comes presented in this gorgeous little gift box which not only looks good but is 100% recyclable. Individually these polishes would make such amazing Christmas gifts but if you're feeling incredibly generous you can purchase a gift set of three, six or 24 nail polishes for your loved ones. The 24 polish gift set comes with a double layer of nail lacquers, just like a chocolate box! If there's a nail colour addict in your life then I can't imagine a better present for them.

The Only Fingers + Toes range is available from Harvey Nichols stores nationwide & online, with professional treatments available at Harvey Nichols Manchester, Grace in Belgravia, The Private Clinic in Cheapside & their flagship salon in South Croydon.


twitter / tumblr / youtube / instagram / bloglovin'
Tuesday, 17 June 2014

New Nails: Essie Nudes


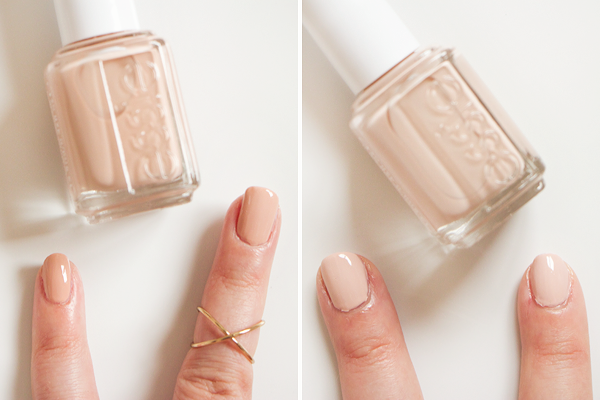
Essie Spin The Bottle* / Essie Topless & Barefoot*

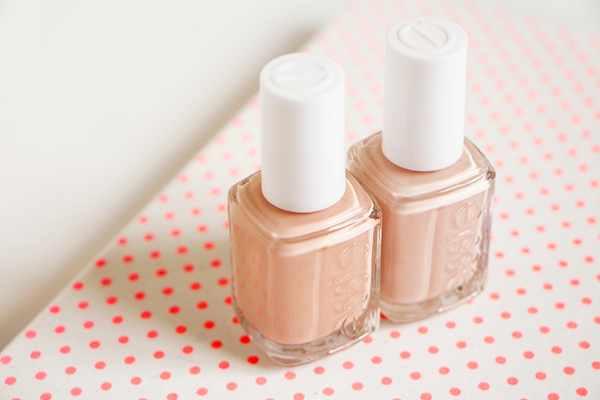
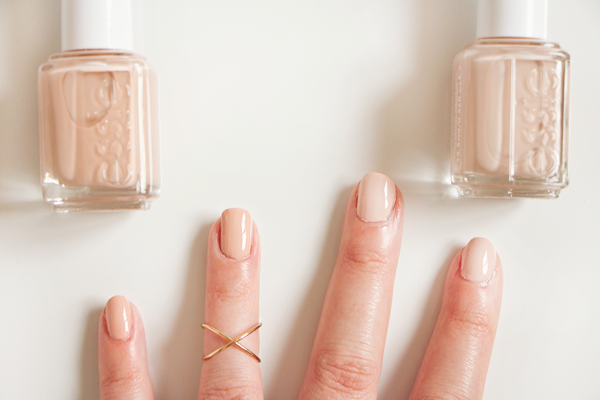
When it comes to choosing a new nail polish I'm normally all over the neons, pastels & glitters. I like my nails to make a statement. For some reason I've been craving classy nude shades lately. Sometimes a bit of minimalism can do you good. My Essie obsession is still in full force so I added a couple of newbies to my collection. If you're after a nude polish there's no better brand than Essie. They have so many different shades to suit every skintone. I decided to get Spin The Bottle from the Hide & Go Chic Spring 2014 collection and Topless & Barefoot from the A French Affair Spring 2011 collection. I was kindly sent these by NailPolish.co.uk. As well as Essie they also stock a huge range of polishes from brands such as Barry M, China Glaze, Tanya Burr & Sally Hansen. They even have the infamous After School Boy Blazer just incase you're still searching for that perfect navy blue. Plus they offer free first class delivery in the UK on every order. The Essie polishes on their site come with the traditional brush rather than the wider one from the Essie diffusion line but that doesn't stop them from being just as awesome.

Although the two shades have a very similar appearance (especially in the bottle) they're actually quite different. Over the years I've heard so much about Topless & Barefoot from other bloggers. It's often raved about as the perfect nude polish. It's a soft & pretty beige pink. It might be slightly too pale for my skintone but I still think it's gorgeous nonetheless. In contrast I've noticed that many people were disappointed with the Spring 2014 collection & said that Spin The Bottle was sheer and streaky. I've got to disagree with them. Just like Topless & Barefoot it was perfectly opaque in two coats. Both of these are a welcome respite from the plethora of sheer nudes that plague nail polish stands. Spin The Bottle is an absolutely beautiful milky peach polish & I love how it looks on me. I know some people aren't fans of the 'mannequin hands' look but I really like how this shade blends in with my skin colour. It's slightly peachier and darker than Topless & Barefoot so I was surprised to find that I prefer this one. It's just so darn flattering. There's nothing quite so effortlessly chic as a nude nail polish & I'm utterly smitten with both of these shades. What's your favourite nude polish?


twitter / tumblr / youtube / instagram / bloglovin'
Saturday, 24 May 2014

DIY Nails Fruity Decals


DIY Nails Fruity Decals* - £6

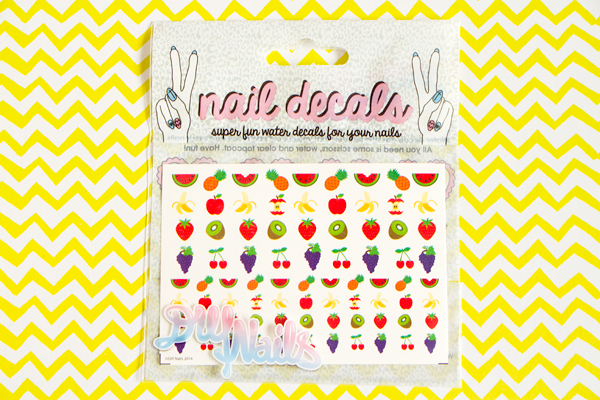
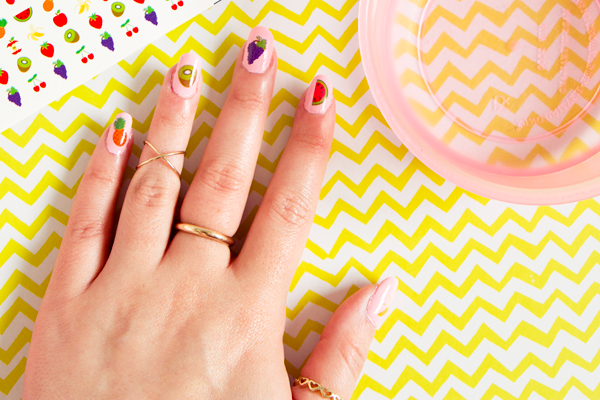
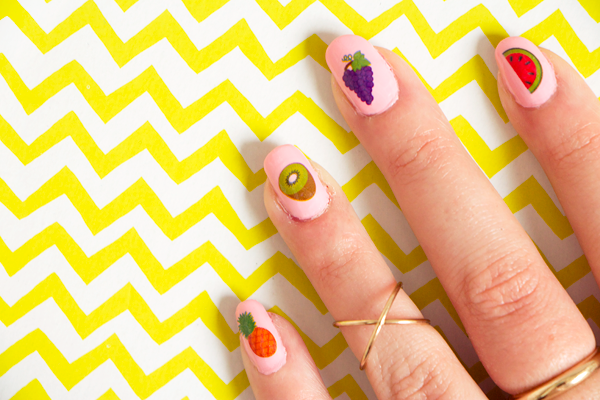
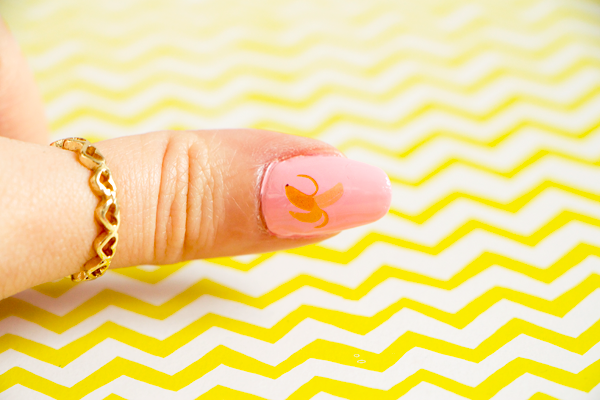
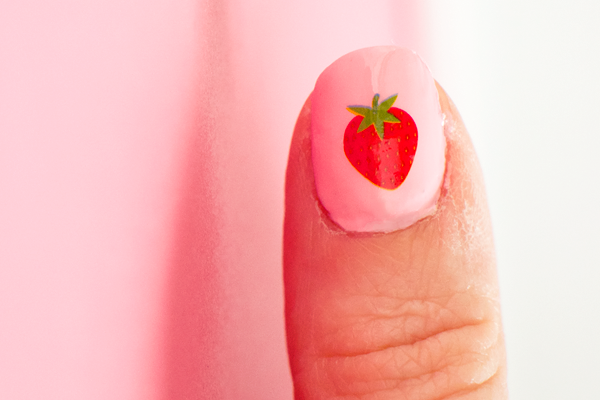
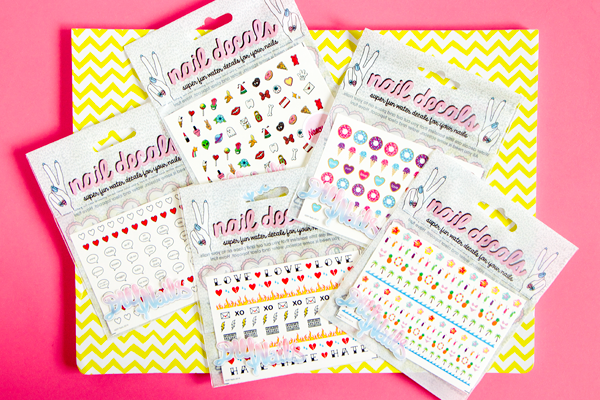
I first tried some of DIY Nails' water activated decals back at Christmas and have been hooked ever since. I love doing my nails but I never have time to do much more than paint them with a single colour. My nail art skills aren't the best either. Polka dots, stripes & daisies are within my ability but that's about it! That's why these decals are such a brilliant idea. They're a quick and easy solution for an awesome looking manicure. No scratchy nail art pens or technical tools required. I recently got sent an incredible package of decals from DIY Nails. The ones that instantly stood out to me were these fruity designs. They're just so bright & colourful, they needed to be on my nails ASAP. For my base colour I went for Model's Own Pastel Pink. It goes really well with most of the designs but the banana is a little hard to see against it. The strawberry looks super cute though. I feel like Carmen Miranda haha!

To use these decals all you need are some scissors, a little bowl of water and a clear top coat. Just cut out the designs you wish to use, pop each one in the water for about 10-20 seconds and then slide them onto your nails. It can be a bit fiddly to begin with but once you get the hang of it, application couldn't be any simpler. I find it easiest to put the transfer at the base of the nail so you can slide the image upwards. You then have a few seconds to adjust the positioning before the design sets into place. I use a bit of kitchen roll to gently pat my nails dry and finally I apply the clear top coat. The decals sit flat on your nails but the extra layer of polish seals everything into place and makes the artwork look completely seamless.


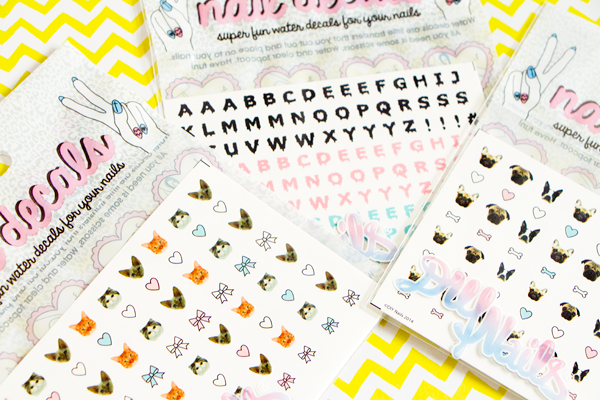
Along with the fruity decals I received a whole host of their new designs. The cats, letters & doughnuts are my other favourites. There's even a little speech bubble with 'sashay away' written in it! This is the perfect opportunity to do some Rupaul inspired nails. At just £6 per pack you can afford to go crazy with these. Each design sheet comes with tons of decals so not only will they last for ages but you can create a totally different manicure every time. DIY Nails decals are available to buy from their online store, ASOS & Urban Outfitters. Check out the DIY Nails Instagram page for some badass nailspiration!


twitter / tumblr / youtube / instagram / bloglovin'
Sunday, 26 January 2014

New Nails: Maybelline Color Show Brocades


Maybelline Color Show Brocades - £3.99

I normally try not to post about limited edition drugstore products because once they're gone, they tend to stay gone. However I'm making an exception for these gorgeous glittery polishes from Maybelline. I received these for Christmas & I think they're some of the loveliest glitters I've come across. Maybelline brought four of the colours over to the UK & here I have Rosy Rosettes, Woven Skyline & Knitted Gold. All three are packed full of glitter & have a subtle golden iridescent sheen to them. Rosy Rosettes is a reddish pink jelly with small gold hex glitter & medium red hex glitter. Woven Skyline is a charcoal jelly with small silver, black & gold glitter particles and larger gold hex pieces. Knitted Gold is a clear base with lots of golden shimmer & two sizes of pink hex glitter. They all look great either on their own or as a top coat. My favourite is easily Knitted Gold. Those rose gold glitter particles are just way too beautiful to resist.

On my nails I'm wearing the classic Essie Mint Candy Apple topped off with one coat of Knitted Gold. The golden pink shimmer & glitter particles reminded me of mermaid scales so I figured they would go well together. I don't think the picture truly captures how pretty this looks. The subtle shimmer makes them really sparkle & shine. Just call me Ariel! I seldom look at nail polishes that aren't located on the Essie stand these days but I'll definitely be keeping an eye on Maybelline's latest collections. I spotted their Street Artist top coats on my last visit to Boots & they look pretty awesome too.


twitter / tumblr / youtube / instagram / bloglovin'
Tuesday, 24 December 2013

DIY Nails Festive Decals


DIY Nails Festive Decals* - £6

For this year's Christmas manicure I turned to an amazing nail art company called DIY Nails. The owner Tammy sent me a lovely little package with a full set of their festive decals - Kitch-mas, Fairisle & Lebkuchen. Aren't they all just adorable? Now these are no ordinary nail art stickers. Not only are water decals really easy to apply but they sit flat on your nail so the overall finish is a lot more professional. You simply cut out the patterns you wish to use, soak them in a bit of water for about 10 seconds and then slide the design onto your nail. It took me a couple of goes to get the hang of it but once you figure out how to slide them neatly, it's a complete doddle. Check out these videos for more of a visual guide to application.

For my nails I used Model's Own Snow White & Red Alert as a base and then mix & matched a few of the patterns. I think the Fairisle set is the nicest overall but I really love those little Christmas puddings. There's so many designs included on each sheet so just one pack will last for ages and you can have something completely different every time. When you're happy with your design you simply seal them with a clear top coat et voilĂ ! Easy peasy festive fingertips. You can now pick up some of the DIY Nails range instore & online at Urban Outfitters too so you can sport some sweet nails all year round. If you love cool nail art but lack the artistic ability to draw your own with some wobbly nail art pens then this method is so much better. It's easy, convenient and looks totally awesome.


twitter / tumblr / youtube / instagram / bloglovin'
Saturday, 16 November 2013

Nail Polish Collection & Storage


70 Bottle Nail Polish Display Stand - £19.99

Following on from yesterday's haul, I thought I'd show you my lovely new nail polish storage. For the past few years I've been housing my nail polish collection in those floral drawers from WHSmith that pretty much everyone used to own. The storage space within it was good but I hated not being able to see all my polishes. I kept buying loads of dupes of the same colours because I was forgetting which ones I already owned. So I decided to find a proper space for them & I bought this display stand from eBay. I'd really recommend the eBay seller I got it from. The stand arrived really quickly and it was packaged in a huge box with a ton of bubble wrap to protect it. You can get them in various sizes but I went for the 70 bottle stand because I wanted to keep everything out in one place. Despite the large amount of polishes it holds I still couldn't manage to fit everything in! There's only a handful that aren't in here now but they're mainly top coats, minis etc. If you're wondering about any of the polishes, here's the full list of everything in the stand:

Top Row
Zoya LC, Zoya Ali, Zoya Paz, Zoya Lulu, Zoya Miley, China Glaze Aquadelic, MAC Bad Fairy, MAC Kid Orange,
MAC Steamy, MAC Gold Veneer

6th Row
Barry M Red Glitter, Barry M Red Black, Barry M Raspberry, Barry M Strawberry Ice Cream, Barry M Peach Melba,
Barry M Yellow, Barry M Spring Green, Barry M Mint Green, Barry M Cyan Blue, Topshop Junkyard

5th Row
Essie Fiji, Essie Chinchilly, Essie Lilacism, Essie Mint Candy Apple, Essie Tart Deco, Essie Mini Shorts,
Essie Cute As A Button, Essie Bachelorette Bash, Essie Bahama Mama, Essie After School Boy Blazer

4th Row
Illamasqua Collide, Illamasqua Jo'mina, Illamasqua Stance, Illamasqua Nomad, Illamasqua Scarce,
OPI Cajun Shrimp, American Apparel Neon Yellow, American Apparel Neon Orange, American Apparel Neon Green

3rd Row
Models Own Hot Stuff, Models Own Disco Inferno, Models Own Dancing Queen, Models Own Freak Out!,
Models Own Boogie Nights, Models Own Ibiza Mix, Models Own Pink Fizz,
Models Own Juicy Jules, Models Own 3 In 1 Basecoat/Topcoat/Glosscoat, Seche Vite Top Coat

2nd Row
Models Own Lemon Meringue, Models Own Aciiied, Models Own 25 Carat Gold, Models Own Fuzzy Peach,
Models Own Orangeade, Models Own Utopia, Models Own Lilac Dream, Models Own Purple Passion,
Models Own Jade Stone, Models Own Green Tea

Bottom Row
Models Own Hedonist, Models Own Pink Punch, Models Own Bubblegum, Models Own Sophie's Pink,
Models Own Pastel Pink, Models Own Balearic Cool, Models Own Blooboo, Models Own Beth's Blue,
Models Own Feeling Blue, Models Own Top Turquoise


twitter / tumblr / youtube / instagram / bloglovin'
Friday, 15 November 2013

New Nails: Essie Additions


Essie After School Boy Blazer / Essie Bahama Mama / Essie Chinchilly / Essie Bachelorette Bash

Like many people I cannot resist the allure of the Essie stand in Boots. It's even harder to stay away when there's a 3 for 2 offer on. So I picked up a few shades that I'd been lusting after for a while. I've been dying to get my hands on After School Boy Blazer. I don't think there's been such a hyped nail polish in the beauty community for a long time. This gorgeous blackened navy sold out really quickly both instore & online. I kept checking my local Boots for weeks but they never restocked it. Then I had the bright idea to check the drawer at the bottom of the stand where one single bottle of it was left. I actually squeed when I saw it. I never normally go for dark colours, even during Autumn/Winter but I'm really feeling the seasonal shades this year. I love this colour so much! If you're still after this polish you're probably better off looking for it online now.

I also got the 'Favourites To Fall For' duo of Bahama Mama & Chinchilly. Neither of those are colours that I would've normally bought but that little box just kept calling to me every time I went into Boots and I'm so glad I got them. They're both such beautiful colours. Bahama Mama is a warm plum shade that couldn't be any more fitting for Autumn. Chinchilly is a sleek granite grey. This was the least pigmented of the bunch as it needed three layers before turning opaque. I actually really like this for an accent nail with a brighter polish on the other fingers. I have a bit of an obsession with hot pinks so the last polish I picked up was Bachelorette Bash. This is such a lovely bright & creamy fuchsia & it goes completely opaque in one coat. I think this one might be my favourite from my mini haul. What's your favourite Essie colour? Not that I need or have any room for more nail polishes but I'm still curious ;)


twitter / tumblr / youtube / instagram / bloglovin'
Friday, 14 June 2013

New Nails: OPI Cajun Shrimp


OPI Cajun Shrimp Nail Polish - £8.99

I go through phases with my nail polish picks. More often than not I reach for pastels or neons as I like something that can make a statement. Red shades are scarce in my collection but there's a select few that I love. In particular coral is a colour that I favour as I think it treads the line between classic and fashion. My favourite ever coral is OPI's Cajun Shrimp. It has the perfect mix of red, orange and pink to make a very wearable yet bright coral. I don't own many OPI nail polishes. I tend to buy their mini sets so I can try out their new shades but it's rare that I'll actually buy a full size one. I think it's probably because they are a few pounds more than most of the polishes you'd find in Boots. I made an exception for Cajun Shrimp because I chose it as my first ever proper salon manicure shade on a trip to New York a few years ago. I've associated this colour with Summer holidays ever since and break it out every year. It looks stunning on any skin tone and will instantly brighten up any outfit. The formula is absolutely amazing too. It's practically opaque after one quick swipe, applies so smoothly and lasts for ages without chipping. It's just literally the perfect Summer red nail polish! It might be raining outside as I type this but it's definitely Summer on my nails. Let me know some of your favourite OPI shades!


twitter / tumblr / youtube / instagram / bloglovin'
Tuesday, 28 May 2013

WIMH Discovery Kit: Welcome Back To Korres


Welcome Back To Korres Discovery Kit* - £15 (Worth £27)

I've got another one of the amazing Discovery Kits from What's In My Handbag for you today. As well as their Ole Henriksen kit I've been trying out their Welcome Back To Korres Kit. Again like Ole Henriksen, Korres are a brand who heavily promote the use of natural, botanical ingredients. The brand originates from Greece so they utilise the Greek flora in all of their products. The result is a wonderful range of skincare, haircare & makeup. I'm sure most people have heard of their lovely Lip Butters and this kit offers you the chance to try a full size one along with two shower gels, a serum, a moisturiser and a nail polish all for just £15.


The Wild Rose Brightening & Line Smoothing Serum is packed full of Vitamin C which really brightens your skin and helps to fade scarring. It's a very light yet hydrating serum that's great for both day and night as it doesn't have any stickiness to it. I only managed to get one application of out of the Wild Rose Moisturising & Brightening Cream sample but from what I could tell it's a very nice moisturiser which would be great for anyone with dry skin. Both of these products have a very pleasant light rose scent so they're lovely to use. I only wish the samples were a bit bigger so I could try them out properly.


These shower gels smell absolutely divine! The Basil Lemon one is my fave because it's super citrusy and invigorating. They make your skin smell really nice too. The only downside is that they do contain SLS which I find to be too harsh on my eczema-prone skin.


The Baby Pink Nail Colour is a lovely sheer milky pink shade. Fellows fans of Essie Fiji & Model's Own Utopia will love this one too. It took about three coats to stop it looking streaky but the finish is really nice - high-shine and very long lasting. It contains myrrh extract, oligoelements and provitamin b5 to help keep your nails strong which is always a bonus.


My favourite item from the kit by far is the Wild Rose Lip Butter. I've heard so much hype about Korres' Lip Butters but never tried one until now and they are incredible! I'm really fussy about lip balms but this one hydrates my lips so well, feels very light to wear and has great pigmentation. I love the deep berry stain of this Wild Rose shade. Both the balm and colour last so well, my lips still looked great even after eating my lunch. I really wish I'd bought one of these sooner! Let me know your favourite shades of these because I'm pretty sure I'll end up buying another.

This kit is well worth the money for the lip balm and nail polish alone, the other bits would be perfect for travelling with or taking to the gym. I don't know how I went so long without trying one of those Lip Butters though!

And don't forget you've got until May 31st to get 20% off any order over £10 at the What's In My Handbag shop with the code SPARKLY20.


twitter / tumblr / youtube / instagram / bloglovin'